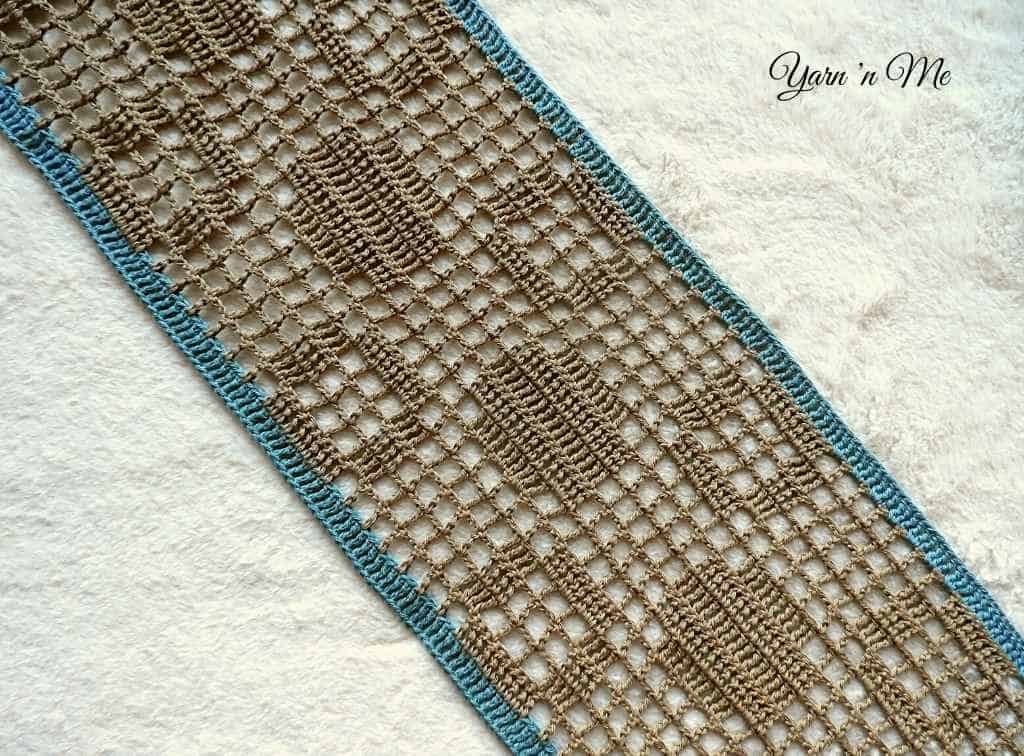
Have you ever seen those designs in grids like your age-old graph-sheets? Have you also seen those designs and pattens in those grids translated to a beautifully laced fabric?
Do you want to crochet those kinds of beautiful fabrics but feel intimidated by those graphs? If that, is you, then you are in the right spot.
This is the place where you get to know how to filet crochet for beginners and start your journey in mastering the art of filet crochet technique.
What is Filet Crochet?
Filet crochet is the technique of making lace-fabric with beautiful patterns using basic crochet stitches like chains and double crochet. Beautiful patterns like flowers and geometric shapes are formed with what is called an open mesh and closed meshes.
When a filet crochet pattern is designed, it is first started on grid charts. Some boxes in the grids are shaded to get a desired design or pattern.
Stitches used in Filet crochet
Filet crochet technique is one of the easiest of the crochet techniques out there. Essentially, it used only chain and double crochet stitches in the pattern.
In some cases, like the Summer Sampler throw, we may use tall stitches like treble crochet and extended double crochet stitches.
When you are comfortable with the basic filet crochet techniques, and feel fancy, you can explore advanced stitches like the filet crochet lacet stitch.
Getting started with the foundation chain
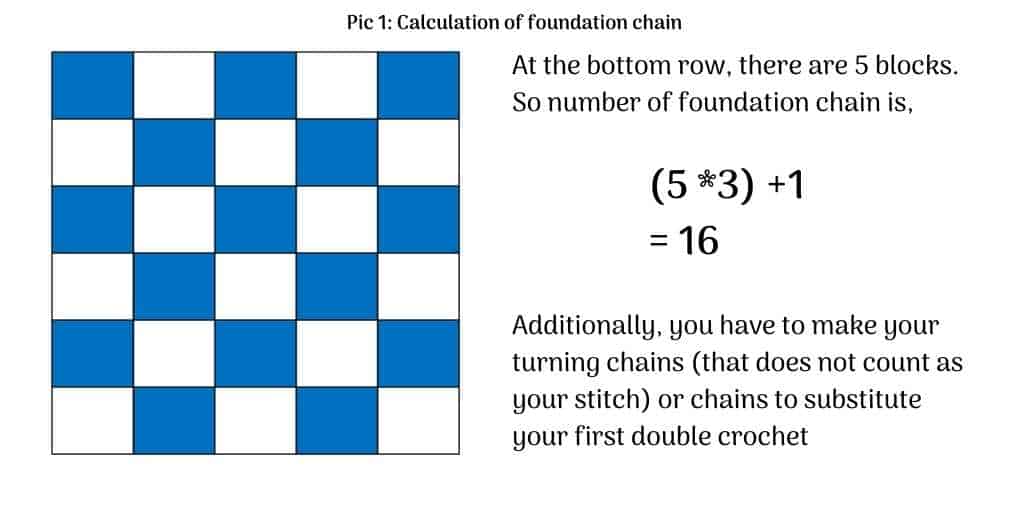
The number of chains you need to make to get started with your filet crochet project is calculated as follows:
No. of ch = no. of blocks in the row * 3 + 1 + turning ch (refer pic1)
The turning chain is the additional chain you need to bring the height of the working loop to the height of the stitches to be formed consecutively.
You can also consider making the turning chains to substitute your first double crochet stitch.
How to read the chart? Direction of work
Like your regular crochet chart, the filet crochet grid chart is also worked from bottom to top. The direction of work doesn’t usually matter until you are going back and forth from row to row.
But for the ease of keeping track of the rows, mimic the way you usually crochet. For right handers, the first row starts at right and for the lefties, the first row starts in the left-side.
In a nutshell, the grid chart is worked from right to left and then left to right, for right-handed crocheters and vice-versa for left-handed crocheters. Just make sure to switch the direction of working the chart for every row.
Chart to stitches
Traditionally, all filet crochet patters are depicted in the form of a grid chart. This design must be then translated into fabric with crochet stitches.
Let us see how a filet crochet chart is usually brought into fabric.
In every row of the grid chart, each vertical line is substituted by a double crochet stitch. (refer pic2)

In every row, each horizontal line is substituted with 2 chain stitches.
The double crochet for the vertical lines and the ch2 for the horizontal lines form the skeleton of the filet crochet.
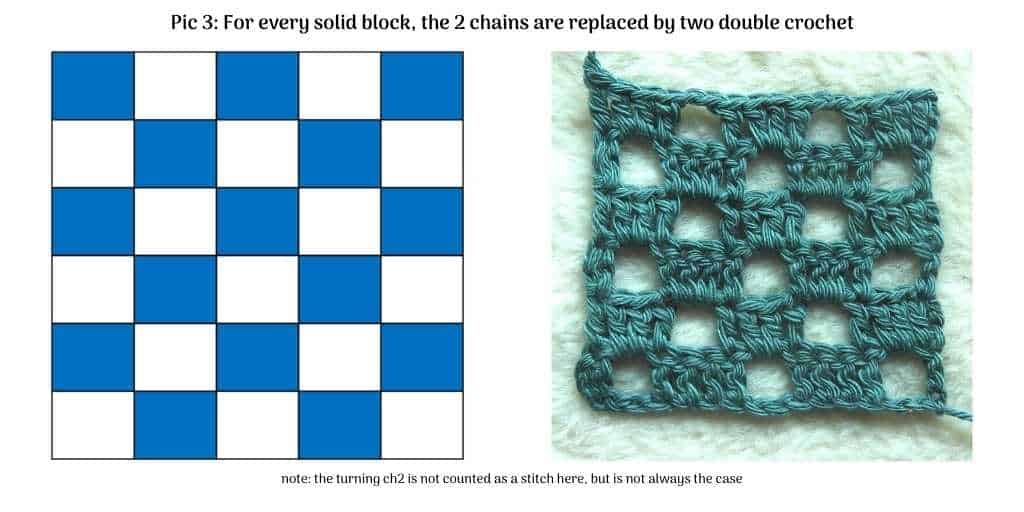
When you see a solid block in the grid, you substitute the ch2 with dc2. (refer pic3)
This is overall how filet crochet is usually done. Now let us get into the nuances.
Let’s talk yarn!
Filet crochet was originally used to make lace- fabrics and therefore only thin, lace weight yarns were used for filet crochet then. Particularly, 100% cotton lace weight yarns were used for filet crochet. In modern days, various yarn weights are used with the filet crochet technique. Ideally 100% cotton yarn, that is non-fuzzy preferably mercerized should be used for filet crochet projects. This is because,
Cotton holds shape and blocks nicely. This enables clear visualization on the designs and patters in the filet crocheted items.
Fuzz-free yarns also helps in clear visualization of the design incorporated in your filet crochet project.
Gauge: How important it is?
In filet crochet, gauge plays a central role. The first reason is obviously to get the intended size of the product. And secondly, to get the pattern/design in the pattern. For instance, if the gauge is too loose, the design in your crocheted item will not show as effectively as it should.
As much as the stitch gauge, the row gauge is also particularly important. With shrunken or elongated height, your image in the pattern will not be a nice one.
The stitch gauge can easily be obtained by changing your hook size.
The row gauge can be obtained by changing to a taller or shorter stitch like extended double crochet or half double crochet, than mentioned in the pattern.
Other factors that improve your filet crochet work
- Placing stitches over chains: When you must make a solid block (closed mesh) over an open mesh, place your two double crochet stitches below the two chain stitches and not into it. This gives a smooth finish in both above-mentioned blocks.
- Blocking: Blocking your finished items is especially important to bring out the perfect shape of the design in the pattern as well as to get the desired size of the item.
This sums all the fundamentals you need in your arsenal to get you started with filet crochet.
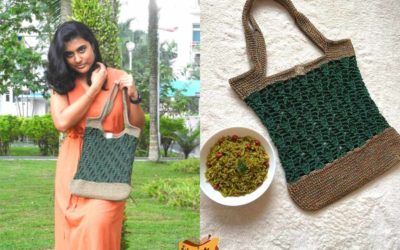
To practice all this hands on, a new e-book with all its details and Filet crochet spring/summer sampler throw.
You can get the e-book from my Ravelry store HERE

Join my Facebook group Yarn ‘n Me makers for more fun content and interaction.
Visit My Ravelry Store to get the print-friendly versions of all my patterns
0 Comments