Flower Garden Table runner- simple filet crochet table runner for beginners

Filet crochet is the most underused crochet techniques. It is also one of the most easy crochet techniques out there. Using only the basic stitches and a single colour of yarn, wonderful designs can be created. Flower Garden Table runner pattern is a simple filet crochet table runner for beginners.

Filet crochet for beginners

Filet crochet at first sight might seem daunting. But trust me when I say, it is the simplest of all crochet techniques. With the knowledge of the fundamentals and a little bit of concentration, you can make wonders with this technique.

If you are new to filet crochet, read THIS post

Flower Garden table runner

The flower Garden table runner pattern is an adaptation from one of the six filet crochet designs in Filet crochet Spring/Summer Sampler throw.

This pattern is one of the ways you can make use of each of the designs in the sampler throw pattern.

Like the sampler throw, the table runner also has three types of instructions – filet crochet grid chart, crochet stitch chart and written instruction, to facilitate an easy filet crochet for beginners.

Made with pure cotton fingering weight yarn and fixed width, the length of the table runner can be altered and customized to your liking.

Where can you get the pattern?

The Flower Garden filet crochet table runner for beginners is available as a separate pattern on my Ravelry store HERE.

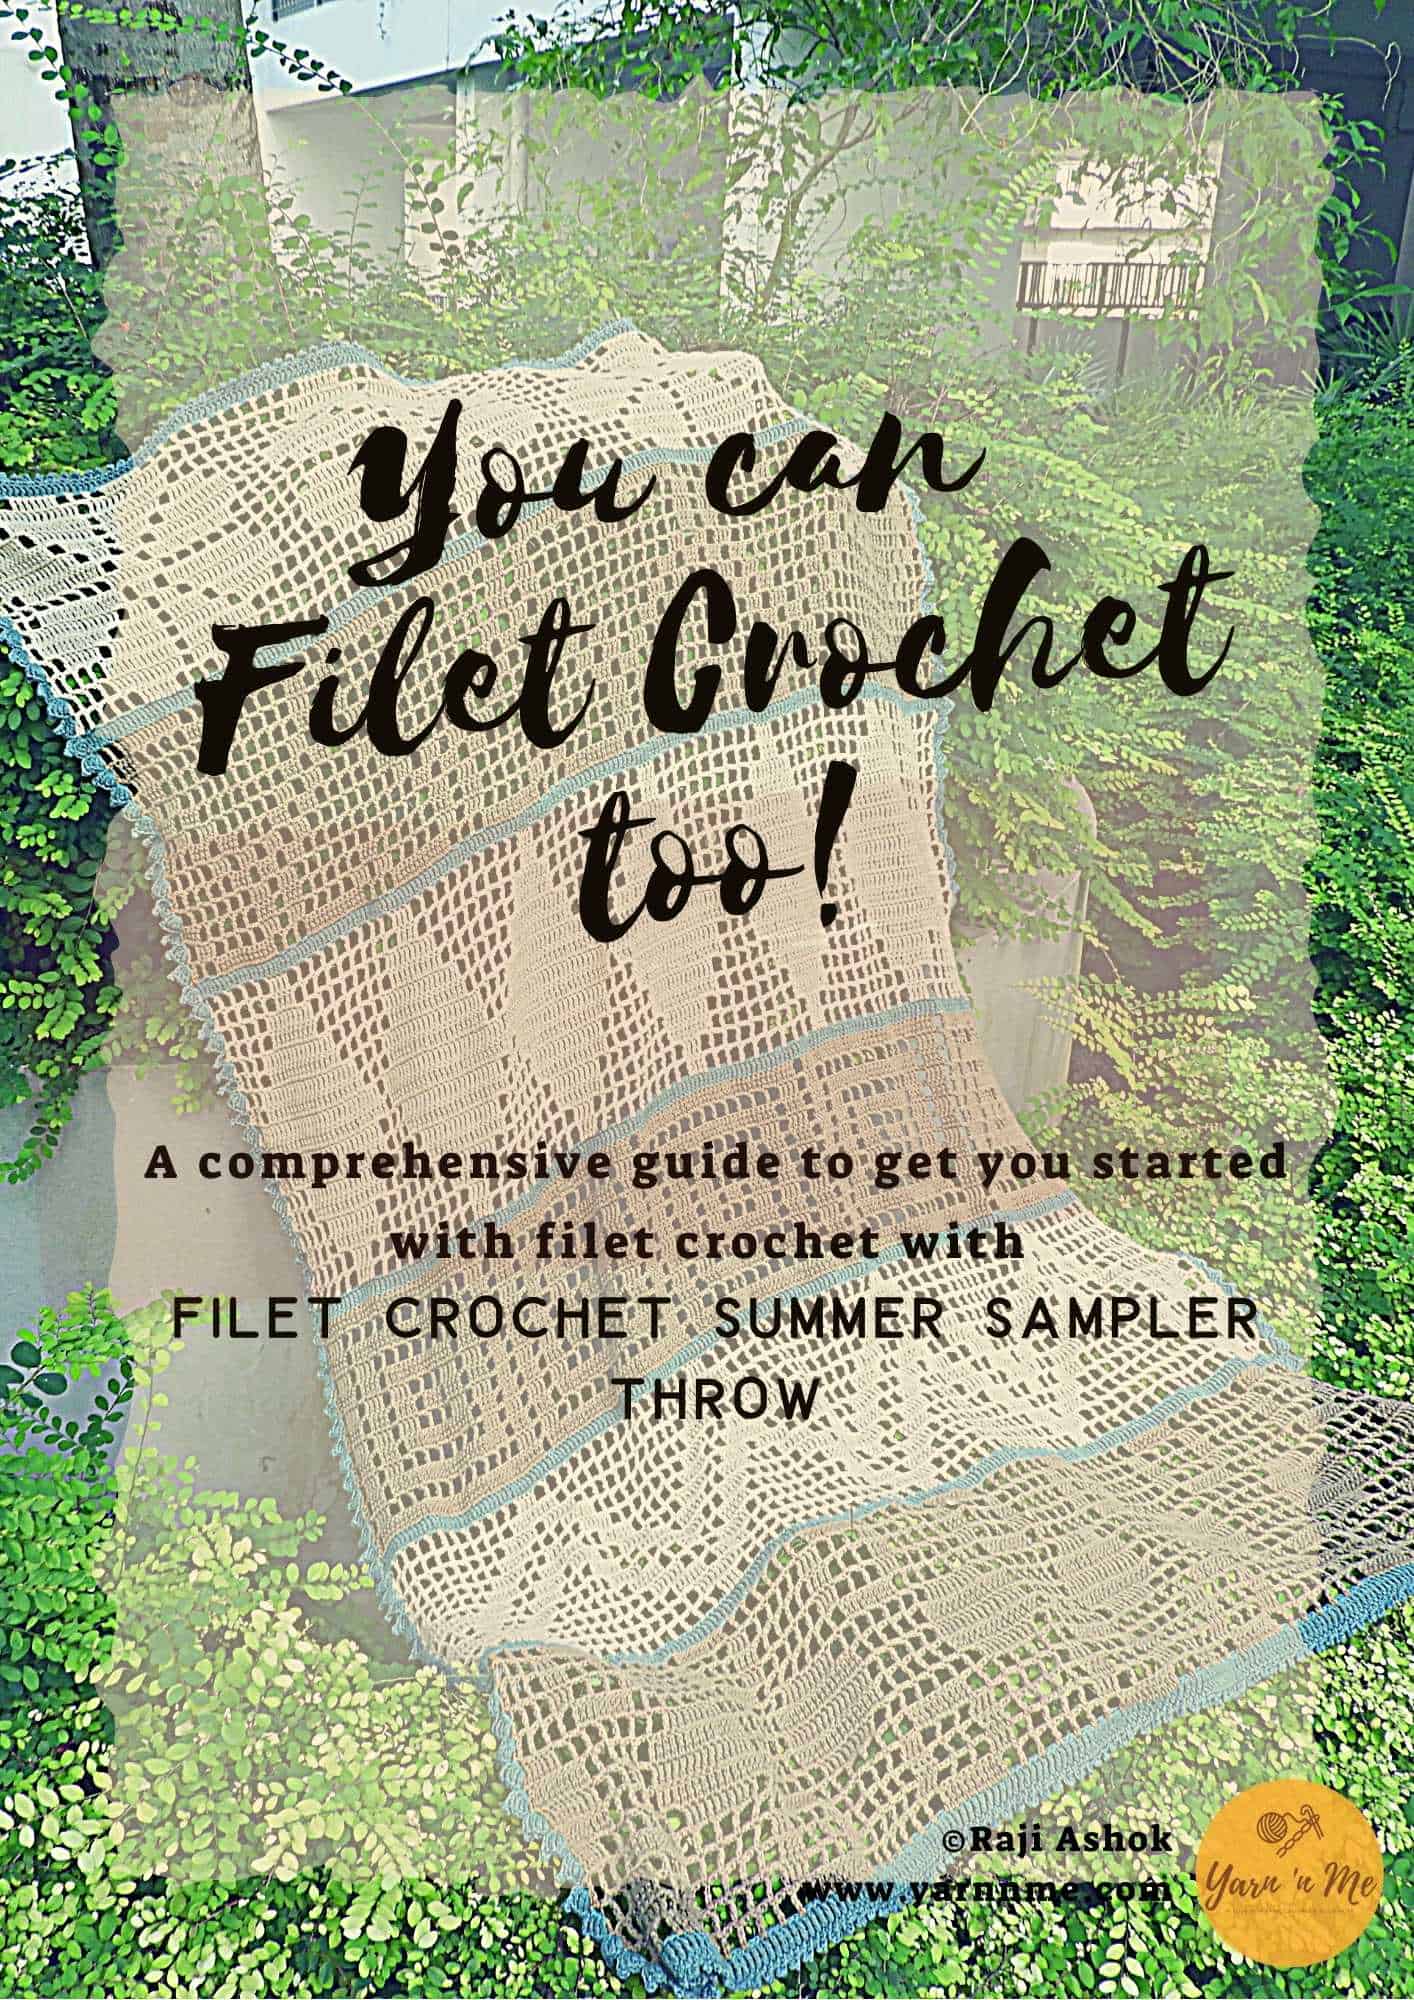
It is also available along with the Filet crochet Spring/Summer Sampler throw pattern in the e-book, ‘You can Filet Crochet too!

Get you copy of the e-book HERE

Filet crochet, though may seem daunting initially, is one of the easiest crochet techniques. The Flower Garden filet crochet table runner for beginners, is one of the most beautiful patterns you can make for your home. Make your table runner for your home space and get to know this beautiful crochet technique.
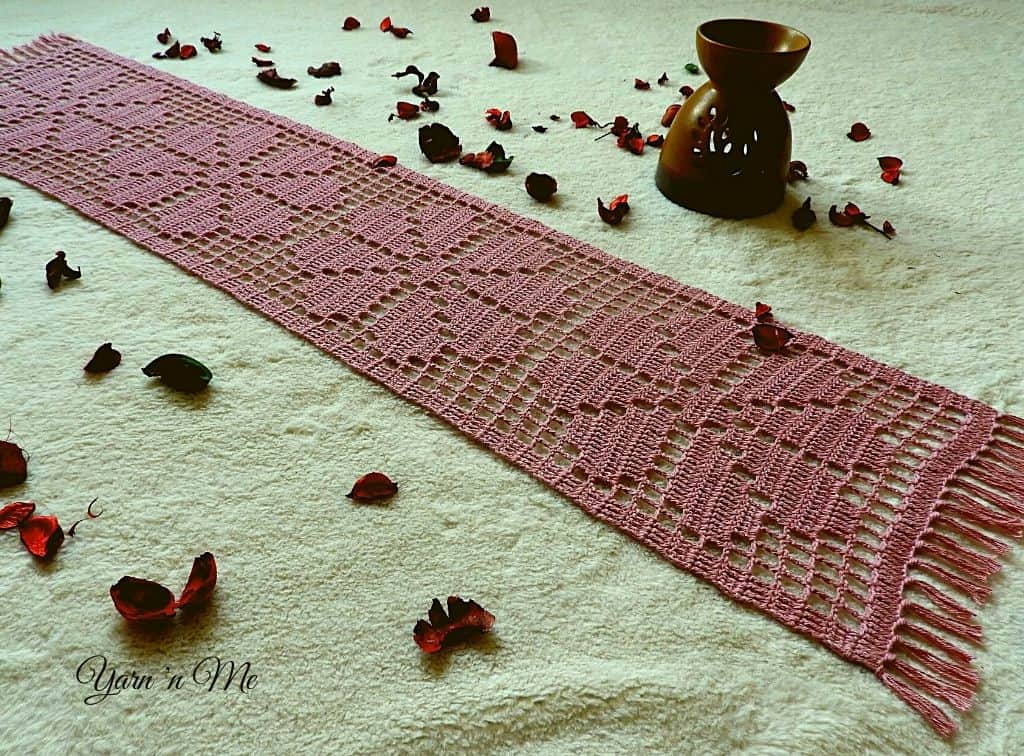
filet crochet table runner for beginners

Join my Facebook group Yarn ‘n Me makers for more fun content and interaction.

Visit My Ravelry Store to get the print-friendly versions of all my patterns

Filet crochet Spring/Summer Sampler throw: the best pattern to learn filet crochet for beginners

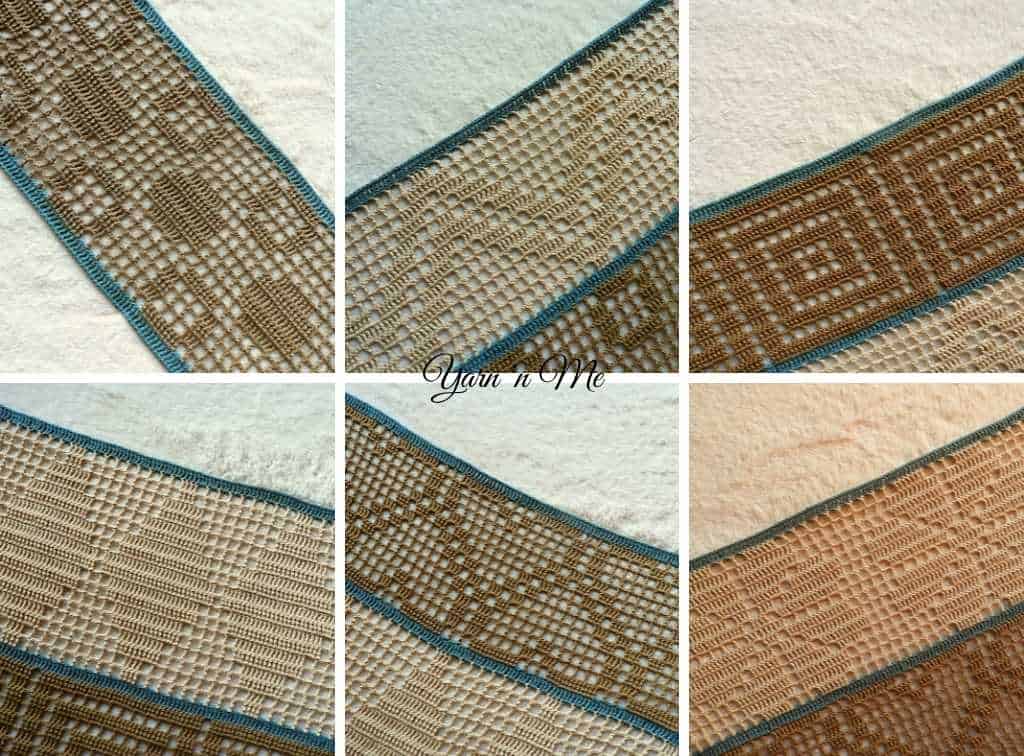
Filet crochet summer sampler throw is a set of 6 basic yet beautiful filet crochet patterns crocheted one over the other and finished with a simple regular crochet border.

Unlike most regular filet crochet patterns that use double crochet stitches, the sampler throw is designed with treble crochet stitches. This is because of the need to get a perfect square for each grid.

The six designs are all you need to get you started with filet crochet and therefore, this ampler throw is the best filet crochet pattern for beginners.

These are your basic geometric patterns that are easy to follow and crochet and the throw contains a few rows or enough rows to complete one full figure of the design.

Each of the six designs is separated by a divider row of continuous treble crochet stitches. And after finishing the six designs, the throw is given a finishing touch with a simple border.

Designs in the Sampler throw

  1. Polka dots, that contain solid and unfilled circles.
  2. Classic Chevron, a continuous zig-zag pattern
  3. Concentric Squares
  4. Dazzling Diamonds, contains a row of diamond shaped pattern.
  5. Spread love is two rows of heart, on inverted over the other.
  6. Flower Garden, a row of simple flowers.

The border is simple fan-like design with picots.

If you are yet to start on your filet crochet journey, read this post here 

filet crochet pattern for beginners

Types of instruction

Filet crochet Summer sampler throw contains three types of instructions,

  • Traditional grid or pixel chart
  • Crochet stitch chart
  • Written instructions

How to make use of the instructions?

  • Filet crochet pros, you are good to go only with the given grid/pixel chat.
  • Filet crochet novices, try crocheting with the grid charts. If you feel stuck or lost where to start, brig yourself on track by referring to either your stitch chart or written instruction.

Testers’ Love

I am very much obliged to my testers who were kind enough to spend their valuable time and energy in testing this filet crochet sampler throw pattern. They willing gave their feedback on the pattern as well.

I’ve enjoyed a lot crocheting this pattern. It was easy to follow the written pattern and the chart also helps a lot for the ones that, like me, prefer crochet graphs. The chosen motifs make a very nice and elegant throw and they bring some kind of variety and fun to the pattern. You never get bored of it!. I would also say that this is as well a perfect pattern to practice what I call “mindful crochet” and to get relaxed and away from your mental noise while crocheting it

Inge Serrano

@ladycrochet

The pattern is accurate and easy to follow even for a beginner. The representations in a grid chart, crochet stitch chart and clearly written instructions makes it an easy-make and can be easily customized to your size requirements. I found it interesting because it 6 different pattern and we could change colors in filet crochet without disturbing its design. I learnt how to exactly customize filet crochet to the size I need because of the detailed stitch count and instructions provided by the designer in pattern. A beautiful and simple border looks great on the throw

Sandhya

@csrbks

Filet crochet is something I would want to learn and experience. I liked the theme of the filet crochet throw. I find it really interesting to work it as each row gives a new perspective.

Thasleem Fathima

@crazycrochetworld

The filet crochet and reading crochet diagrams was a totally new experience for me. The pattern took some time to get used to. Lot of frogging initially but once I got a hang of it, it worked up quite fast. It was a totally new and awesome experience to create patterns and designs in filet crochet.

Archana

@vandvbyvarba

How to make use of the instructions?

  • Filet crochet pros, you are good to go only with the given grid/pixel chat.
  • Filet crochet novices, try crocheting with the grid charts. If you feel stuck or lost where to start, brig yourself on track by referring to either your stitch chart or written instruction.

How further can you use the sampler throw pattern?

The filet crochet sampler throw is built on a fixed foundation chain. To make the throw, you start with that foundation chain number, and no change about that.

If you would like to make only the sampler throw, you can get the print-friendly version of the pattern HERE

But each of the six designs has different stitch multiples. And those multiples had been given along-side each of the design in the e-book. You can use those multiples to make any item of your choice in the future like table runner, tablecloth, shawls, etc.,

The e-book, ‘You can Filet crochet too!’ contains all the knowledge you need to get you started with filet crochet technique along with this Summer/Spring Sampler thro pattern. Besides, individual stitch multiples of the six designs are also elaborated in the e-book and you can use this to make your own decors and accessories.

You can get your copy of the e-book HERE

A couple more filet crochet patterns will be added in the e-book soon, at no additional cost. So do not miss it!

e-book

Spring/Summer Sampler throw is the best filet crochet pattern for beginners. It has six simple designs to practice, three types of instructions to guide you along and all you need to get started with Filet crochet.

filet crochet pattern for beginners

Join my Facebook group Yarn ‘n Me makers for more fun content and interaction.

Visit My Ravelry Store to get the print-friendly versions of all my patterns
Dilly Diamond Placemats Set: The Textured Crochet Placemat And Coaster Pattern You Need

Dilly Diamond Placemats set: The textured crochet placemat and coaster pattern you need

Are you bored of your regular circular crochet placemats and coaster pattern?

Are you looking for some unique not-circular placemat set to crochet for your home space?

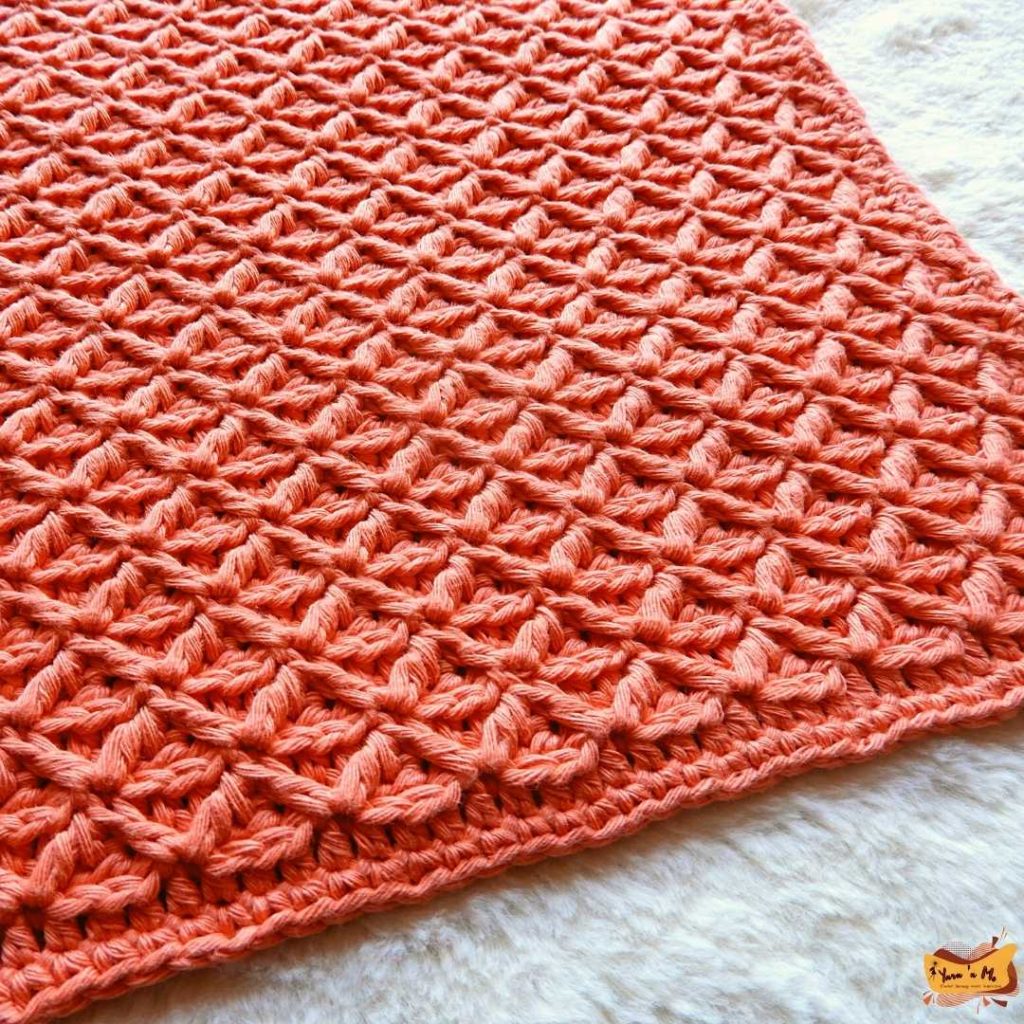
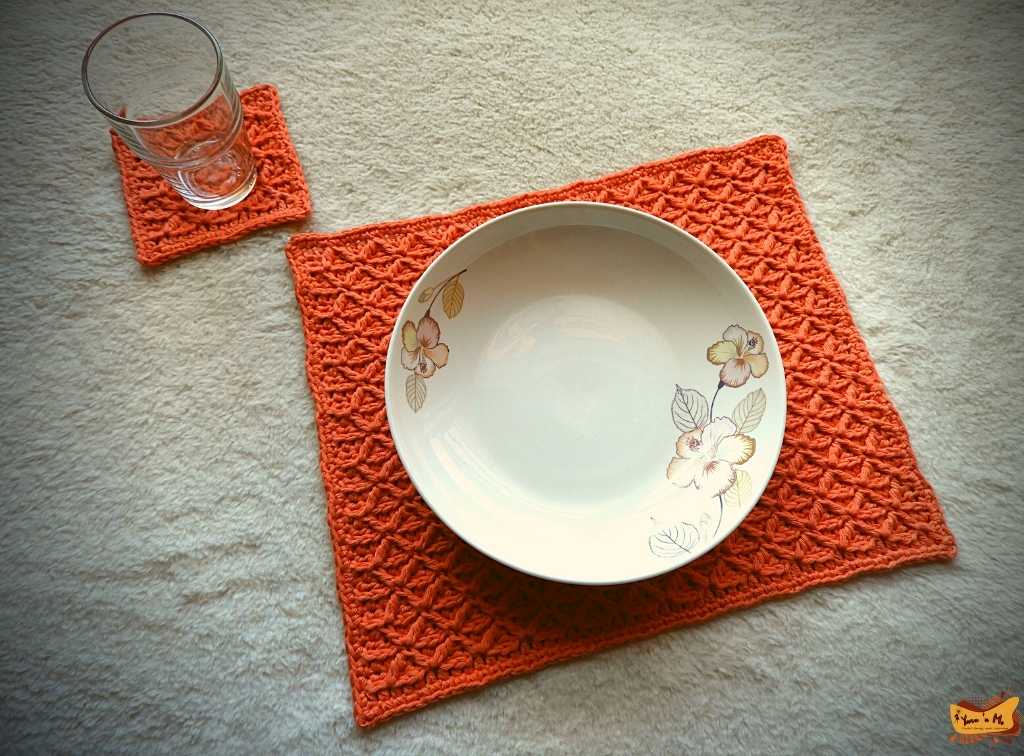
Dilly Diamond Placemats set is exactly what you need. The placemats and coasters are rectangle and square respectively, designed using textured stitches (but not using post stitches). And can instantly elevate the look of your dining space.

Get your copy of the Dilly Diamond crochet placemat and coaster pattern HERE

Design Inspiration

Rug coasters are quite trending as gifts from the maker community. They are quick to make, have a rustic look to them and if I might say, feels unique from those traditional round-shaped coasters. I always wanted to make a different kind of rug coaster, something textured yet practical. And ended up with the coaster design, which later I expanded to a placemat set

The Design

Dilly Diamond Placemat and coaster pattern are designed to be rectangle and square respectively of dimensions 12.6” by 10” and 4” by 4”.

The texture in this pattern is obtained by placing the stitches varyingly in three of the loops of half double crochet stitches. 

The diamond shape is obtained by making two stitches together by skipping stitches in between the legs of those two stitches. The pattern has picture tutorials as well, on how to make these stitches.

crochet placemat and coaster pattern

What you will need to make this crochet placemat and coaster pattern?

All you need to work this pattern up is a 4.5mm crochet hook and a 100% cotton worsted weight yarn. I used a little less than 2.5 skeins of Garnstudio Drops Paris for one set of coaster and placemat.

And of course, you will need a copy of the pattern, which you can get HERE.

Do you know? The pattern has written instructions, a stitch chart, and picture tutorials for the stitches

Yes, you have all you need to make the pattern. 

So, what are you waiting for? Grab the pattern HERE and start making your Dilly Diamond placemats set. Just make sure to tag me when you post your finished object!

crochet placemat and coaster pattern

Looking for circular placemats set? Check out my Cluster Around Placemats, a free crochet pattern

Visit My Ravelry Store to get the print-friendly versions of all my patterns

Sanctuary of Shells Scarf: the crochet scarf pattern with all your favourite shell stitches

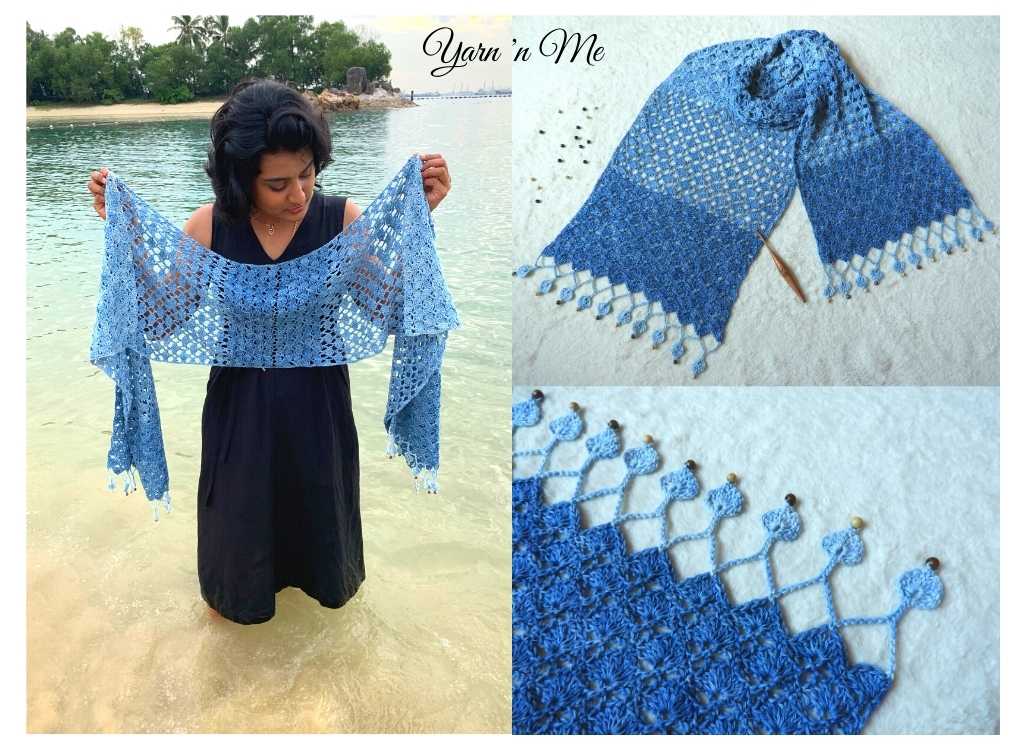
Sanctuary of shells scarf is a crochet scarf pattern where variations of shell stitch pattern come to one place. The shell stitches used in this pattern are a combination of both lacy and solid stitches. This scarf can be made suitable for any of the seasons by just changing your yarn with a different fiber content.

Inspiration

I am a beaches and sea kind of person. The waves of the ocean never fail to inspire me. It was during from one of my visits to the beaches the idea for this pattern was born. The shores had tiny shells of various shape and sizes. This sparked a pattern with various shell stitches and thus the Sanctuary of Shells crochet scarf pattern came to form.

Construction

Sanctuary of Shells is a rectangle crochet scarf pattern, but its construction has a twist. The scarf is worked centre-out  on either of the sides. Working the foundation chain, the scarf is first worked on one side. Starting from the same foundation chain it is then worked on the other side. On either sides, the scarf is finished with a tassel-like shell edging. This edging is the icing on the cake and adds additional beauty to the scarf.

crochet scarf pattern

For a regular rectangle scarf pattern, see my Puffs on Slalom scarf pattern.

Yarn

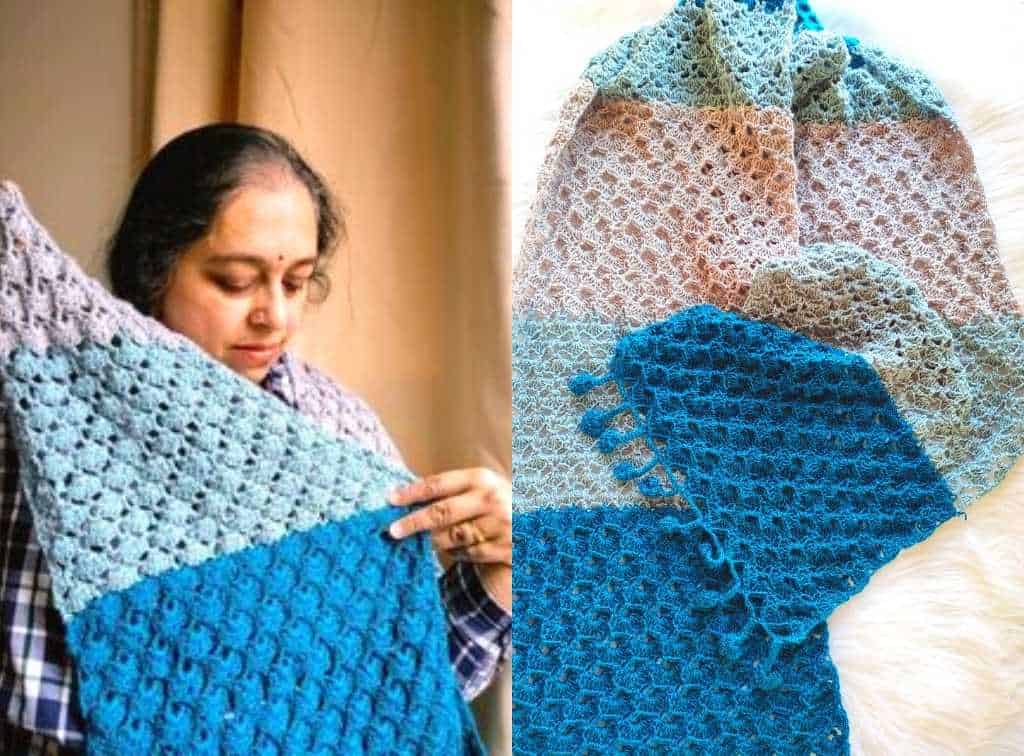
This crochet scarf pattern is originally designed using three skeins of Scheepjes Skies light: one skein in each of 111 Cumulus, 110 Cirrus and 109 Cirrocumulus. 

Each skein of Scheepjes skies light is 340m/100g. You can use any similar fingering weight yarn in three solid colours or one solid colour. I highly recommend not to use gradient yarns like Whirl, as they do not work well for the pattern. The pattern can also be worked in a single or dual colour as well.

Other materials

Apart from regular supplies of materials like yarn, crochet hook (4mm and 3.5mm) and scissors, wooden beads were also used in this pattern. These wooden beads were used in the edging to give a mild weight and flow to the tassel-like structure.

You can get the print-friendly version of the pattern on my Ravelry Store HERE

My Testers

Sanctuary of Shells crochet scarf pattern would not have come to life without my testers. I really could not thank them enough as they came out with their test results amidst several unexpected challenges.  You can find their work below. 

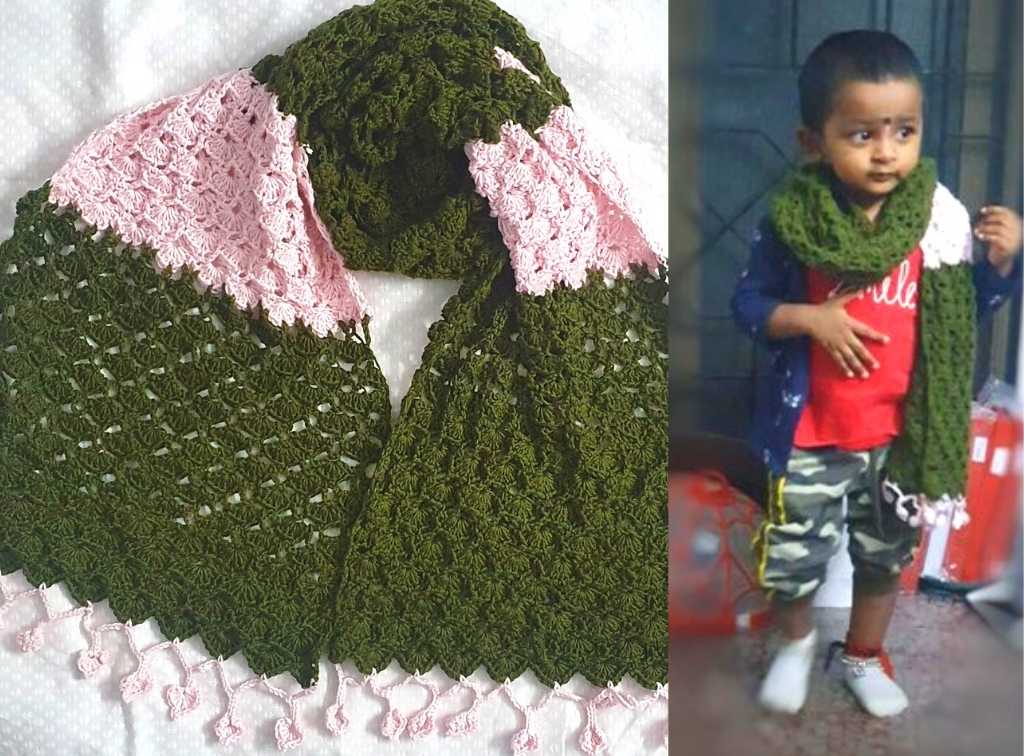
Vimala @ vimalavignesh has made her scarf in three beautiful shades of blue

crochet scarf pattern


Archana, @vandvbyvarbha has made her scarf in two contrasting colours and we cant get enough of her cute daughter modelling it.

crochet scarf pattern

You can get the print-friendly version of the pattern on my Ravelry Store HERE. 

Thanks a ton for your invaluable support. I hope that you enjoyed making this pattern.

If you share your project on Instagram, please tag me and post it with the hashtags #yarnnmedesigns and #yarnnmemakers. I would love to see your creation.

Join my Facebook group Yarn ‘n Me makers for more fun content and interaction.

Visit My Ravelry Store to get the print-friendly versions of all my patterns

Diamond Bobble tote – The largest crochet tote pattern in the series

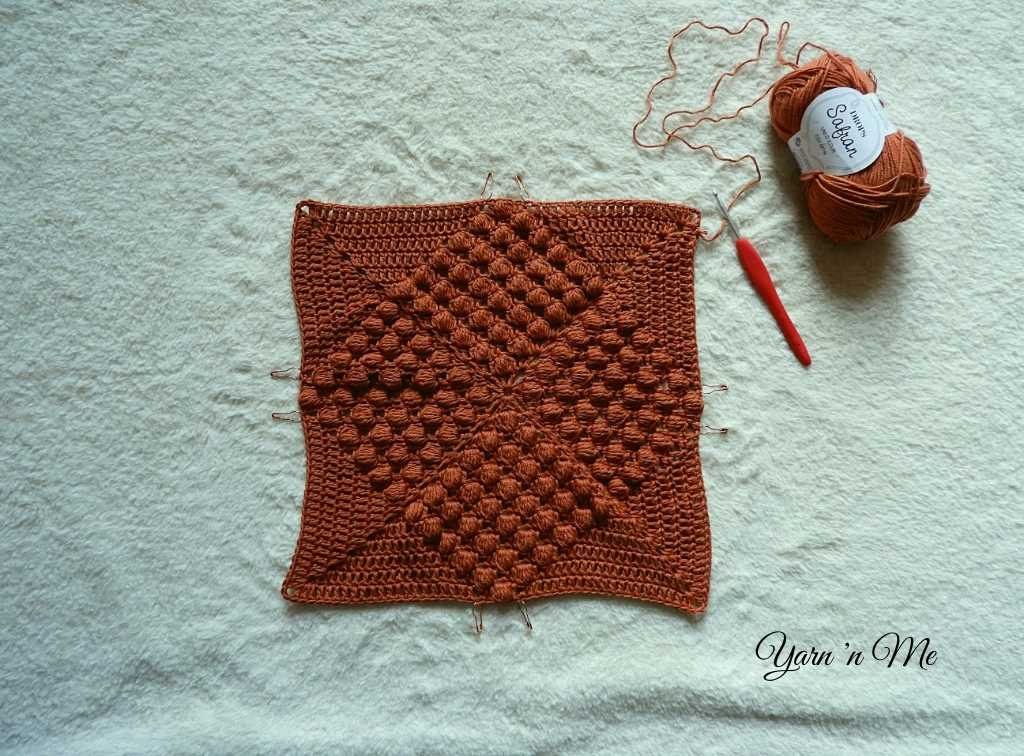
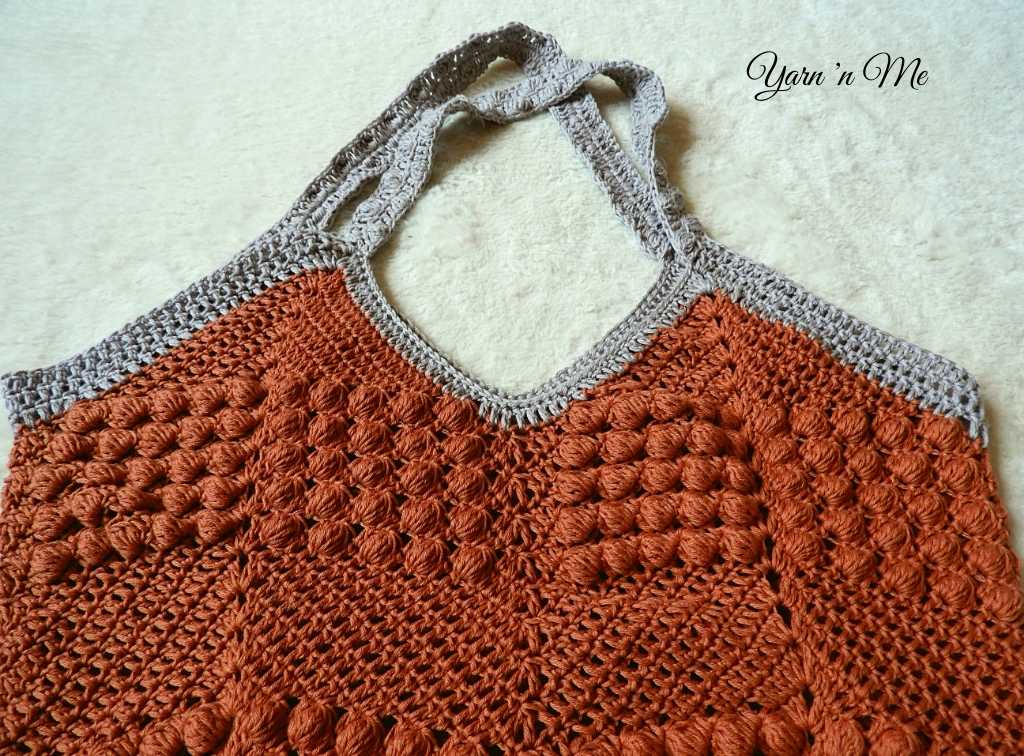
Diamond bobble tote is the fourth and last crochet tote pattern in the Granny Square base tote bag series. The diamond shapes that appear in the tote are achieved using bobble stitches placed at intervals. The base of the tote has four diamonds radiating from the centre of the square while the body has eight.

Like all preceding three totes in the series, the handles of this tote are also made seamlessly. But the way the handles are crocheted is different from the rest of the totes.

Pattern level

Intermediate

Materials

Yarn: 100% cotton sport weight yarn, main colour – 640m, accent colour 100m

Crochet hook: 3.5 mm and 3.25 mm or any size to obtain the gauge

Yarn Needle

Scissors

Stitch markers: 8

Abbreviations

adj – adjacent

bo – bobble

ch – chain

cdc – chainless double crochet (can be substituted with ch3)

dc – double crochet

fsc – foundation single crochet

R – round

slst – slip stitch

sk – skip

sp – space

st(s) – stitch(es)

Special stitches

  • bo – bobble

7dc/5dc together, ch1

The bo in the base and body indicates (7dc-tog, ch1) while that in the handle is (5dc-tog, ch1)

  • dc3tog – three double crochet placed together

*yarn over, insert hook into next stitch, yarn over, pull up a loop, yarn over pull through two loops, sk next st* once more, yarn over, insert hook into next stitch, yarn over, pull up a loop, yarn over pull through two loops, yarn over pull through all four loops on hook.

Gauge

The base measures 4” after round 5

Finished dimension

Base: 10” square

Height: 21” from centre of the base to the point where handles are attached when laid flat (excluding the handles)

Note

  • The tote is worked in rounds. So, there is no turning after every round 
  • Do remember to skip three stitches between the legs of the dc2tog 
  • Slst to the next ch2-sp to begin the next round, unless specified 
  • While placing st on the bobble, place it in the ch1 that is made after the bobble, not on the 7dc/5dc-tog. 
  • The bo in the base and body indicates (7dc-tog, ch1) while that in the handle is (5dc-tog, ch1)  

Get the print-friendly version of the pattern on my Ravelry Store HERE and get the Keep it Simple Produce Bag pattern for free on purchase.

Instruction

Base

Using 3.5 mm hook, Magic Ring

R1: ch5 (counts as dc, ch2), *3dc, ch2* twice more, 2dc. Join with slst to 3rd ch

R2: (cdc, dc, ch2, 2dc) in ch2-sp, *dc, bo, dc, (2dc, ch2, 2dc) in ch2-sp* twice more, dc, bo, dc. Join with slst to cdc.

R3: (cdc, dc, ch2, 2dc), *dc, bo, (dc3, bo in next st) until before 1dc, dc, (2dc, ch2, 2dc) in ch2-sp* twice more, dc, bo, (dc3, bo in next st) until before 1dc, dc. Join with slst to cdc.

R4-R7: Repeat Row 3

You will have 6 bobbles on each side of the square in R7

R8: (cdc, dc, ch2, 2dc), *dc5, bo, (dc3, bo in next st) four times, dc5, (2dc, ch2, 2dc) in ch2-sp* twice more, dc5, bo, (dc3, bo in next st) four times, dc5. Join with slst to cdc.

R9: (cdc, dc, ch2, 2dc), *dc9, bo, (dc3, bo in next st) thrice, dc9, (2dc, ch2, 2dc) in ch2-sp* twice more, dc9, bo, (dc3, bo in next st) thrice times, dc9. Join with slst to cdc

R10: (cdc, dc, ch2, 2dc), *dc13, bo, (dc3, bo in next st) twice, dc13, (2dc, ch2, 2dc) in ch2-sp* twice more, dc13, bo, (dc3, bo in next st) twice, dc13. Join with slst to cdc

R11: (cdc, dc, ch2, 2dc), *dc17, bo, dc3, bo, dc17, (2dc, ch2, 2dc) in ch2-sp* twice more, dc17, bo, dc3, bo, dc17. Join with slst to cdc

R12: (cdc, dc, ch2, 2dc), *dc21, bo, dc21, (2dc, ch2, 2dc) in ch2-sp* twice more, dc21, bo, dc21. Join with slst to cdc.

Lay your base flat

Place marker on the 22nd and 26th st on each side of the square. (There will be dc, bo, dc between the two markers on each side)

granny square base crochet tote pattern

Body

Set up row

Note: In this row, the legs of dc3tog on each side will be on the first stitch marker, bobble, the second marker, respectively.

(cdc, dc, ch2, 2dc), *dc21, dc3tog, dc21, (2dc, ch2, 2dc) in ch2-sp* twice more, dc21, dc3tog, dc21. Join with slst to cdc.

R1: (cdc, dc, ch2, 2dc), *dc, bo, dc19, dc3tog, dc19, bo, dc, (2dc, ch2, 2dc)* twice more, dc, bo, dc19, dc3tog, dc19, bo, dc. Join with slst to cdc.

R2: (cdc, dc, ch2, 2dc), *dc, bo, dc3, bo, dc15, dc3tog, dc15, bo, dc3, bo, dc, (2dc, ch2, 2dc)* twice more, dc, bo, dc3, bo, dc15, dc3tog, dc15, bo, dc3, bo, dc. Join with slst to cdc.

R3: (cdc, dc, ch2, 2dc), *dc, bo, (dc3, bo in next st) twice, dc11, dc3tog, dc11, bo, (dc3, bo in next st) twice, dc, (2dc, ch2, 2dc) in ch2-sp* twice more, dc, bo, (dc3, bo in next st) twice, dc11, dc3toh, dc11, bo, (dc3, bo in next st) twice, dc. Join with slst to cdc.

R4: (cdc, dc, ch2, 2dc), *dc, bo, (dc3, bo in next st) thrice, dc7, dc3tog, dc7, bo, (dc3, bo in next st) thrice, dc, (2dc, ch2, 2dc) in ch2-sp* twice more, dc, bo, (dc3, bo in next st) thrice, dc7, dc3tog, dc7, bo, (dc3, bo in next st) thrice, dc. Join with slst to cdc.

R5: (cdc, dc, ch2, 2dc), *dc, bo, (dc3, bo in next st) four times, dc3, dc3tog, dc3, bo, (dc3, bo in next st) four times, dc, (2dc, ch2, 2dc) in ch2-sp* twice more, dc, bo, (dc3, bo in next st) thrice, dc3, dc3tog, dc3, bo, (dc3, bo in next st) four times, dc. Join with slst to cdc.

R6: (cdc, dc, ch2, 2dc), *dc5, bo, (dc3, bo in next st) thrice, dc3, dc3tog, dc3, bo, (dc3, bo in next st) thrice, dc5, (2dc, ch2, 2dc) in ch2-sp* twice more, dc5, bo, (dc3, bo in next st) thrice, dc3, dc3tog, dc3, bo, (dc3, bo in next st) thrice, dc5. Join with slst to cdc.

R7: (cdc, dc, ch2, 2dc), *dc9, bo, (dc3, bo in next st) twice, dc3, dc3tog, dc3, bo, (dc3, bo in next st) twice, dc9, (2dc, ch2, 2dc) in ch2-sp* twice more, dc9, bo, (dc3, bo in next st) twice, dc3, dc3tog, dc3, bo, (dc3, bo in next st) twice, dc9. Join with slst to cdc.

R8: (cdc, dc, ch2, 2dc), *dc13, bo, dc3, bo, dc3, dc3tog, dc3, bo, dc3, bo in next st, dc13, (2dc, ch2, 2dc) in ch2-sp* twice more, dc13, bo, dc3, bo, dc3, dc3tog, dc3, bo, dc3, bo, dc13. Join with slst to cdc.

R9: (cdc, dc, ch2, 2dc), *dc17, bo, dc3, dc3tog, dc3, bo, dc17, (2dc, ch2, 2dc) in ch2-sp* twice more, dc17, bo, dc3, dc3tog, dc3, bo, dc17. Join with slst to cdc.

R10-18: Repeat R1-R9

Fasten off after slst. (Do not slst to ch2-sp)

Using 3.25 mm hook, join accent colour to the same st as join.

Note: If you are using different hook size, just go down a hook size for this part.

R19: cdc, dc, *(2dc, ch2, 2dc), dc47* twice more, (2dc, ch2, 2dc), dc45. Join with slst to cdc. Do not slst to ch2-sp.

Handles

From next row onwards, we will be working the handles along with the body.

R20: cdc, dc3, *2dc in ch2-sp, fsc63, 2dc in the next ch2-sp*, dc 51, repeat **, dc47. Join with slst to cdc. Do not slst to ch2-sp.

R21: cdc, dc5, *dc3 on fsc, (bo, dc3) until last fsc, ch3, slst between fsc and dc, ch3, working on the other side of fsc, dc, bo, (dc3, bo in next st) until before the last fsc, dc on last fsc, slst in the adj dc from R19, slst49, slst on next dc of R19 together with the dc placed on the other side of fsc, ch4 behind the fsc*, dc55, repeat **, dc49. Join with slst to cdc.

Fasten off and weave in ends.

And now, your tote is ready to take out for shopping.

Thanks a ton for your invaluable support. I hope that you enjoyed making this pattern.

If you share your project on Instagram, please tag me, and post it with the hashtags #yarnnmedesigns and #ecofriendlycrochetfor2021. I would love to see your creation.

crochet tote handle

Join my Facebook group Yarn ‘n Me makers for more fun content and interaction.

Visit My Ravelry Store to get the print-friendly versions of all my patterns
Wanderlust Shawlette & Headscarf crochet pattern- a simple and elegant one-skein wonder

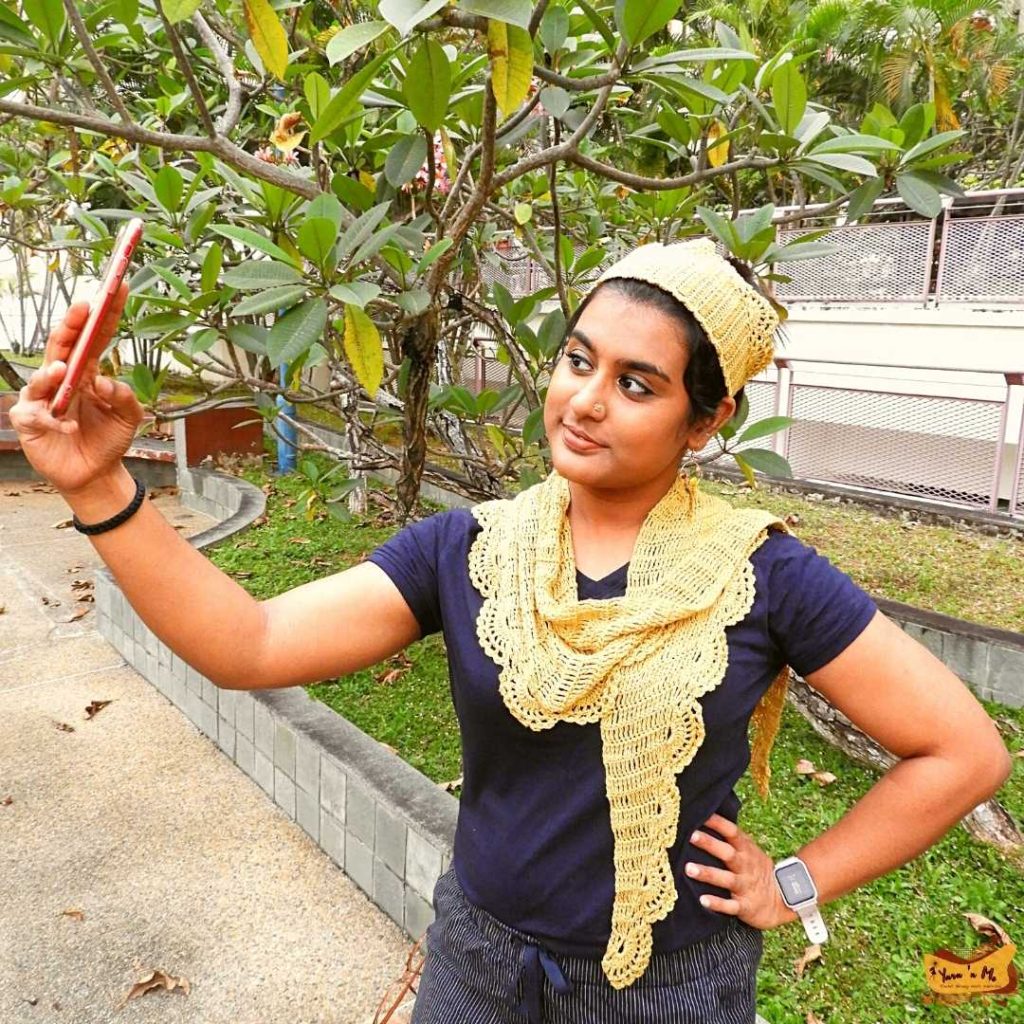
Wanderlust shawlette is a simple flat triangular summer scarf. The crochet shawlette and headscarf pattern is a one-skein wonder and can be made literally with a single cake of Scheepjes whirlette. The shawlette and the matching headscarf are quick to make despite using a thinner yarn and a small crochet hook. They can instantly amp up your basic outfits and make you well put together when you have not tried them.

Add this to your Ravelry favorites HERE

The name

There is no deep-cut reason for naming this pattern “the Wanderlust.” I am always fascinated by the idea of a solo trip with bare minimums. We pack our basics and a few accessories for trips to bring out the outfits. Wanderlust patterns fit perfectly to this.

Construction of the crochet shawlette and headscarf

The shawlette and the headscarf are constructed from one end of the triangle to the other. There is a gradual increase along one side at the beginning, a few rows worked without any increase/decrease, and finally, a gradual decrease in the stitches along the same side as the increase. Later, they are completed with a simple yet elegant border. The headscarf has ties at both ends to facilitate easy tying.

Would you like to make an easy triangle shawl? Check out my Simple Summer Shawl here.

Pattern level

Easy

Materials

  • Scheepjes whirlette
  • Crochet hook 3.25 mm and 3 mm
  • Scissors
  • Tapestry Needle

Gauge

Shawlette

18 stitches in 6½ rows of treble crochet for the shawlette using a 3.25 mm crochet hook

Headscarf

23 stitches in 9 rows of dc for the head scarf using a 3 mm crochet hook

Finished dimensions

Shawlette: 66” long & 10” wide

Headscarf: 20.5” long & 4.5” wide, excluding ties

Pattern testers

I extend my heartfelt thanks to my testers, who helped me bring this pattern out with perfection.

Hema @yarnfables

Oty @itsrajutanmama

Anila @anila_rosee  

They are amazing makers. You would want to check them out!

I have more designs in the pipeline. So, if you would like to test my patterns in the future, keep an eye on my Instagram Profile HERE.

crochet shawlette and headscarf pattern

Get the Crochet Shawlette and Headscarf pattern on my Ravelry Store HERE

Make sure to use the hashtags #yarnnmedesigns and #yarnnmemakers. I would love to feature your work on my profile.

Follow me on Instagram for more updates on my pattern designs and WIPs. Sign up for my newsletter to get a pattern release discount code. Take care!