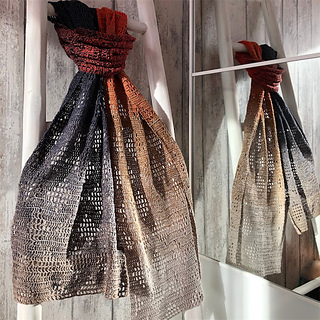
Let’s Filet Crochet! The ultimate guide on how to filet crochet for beginners

Have you ever seen those designs in grids like your age-old graph-sheets? Have you also seen those designs and pattens in those grids translated to a beautifully laced fabric?

Do you want to crochet those kinds of beautiful fabrics but feel intimidated by those graphs? If that, is you, then you are in the right spot.

This is the place where you get to know how to filet crochet for beginners and start your journey in mastering the art of filet crochet technique.

What is Filet Crochet?

Filet crochet is the technique of making lace-fabric with beautiful patterns using basic crochet stitches like chains and double crochet. Beautiful patterns like flowers and geometric shapes are formed with what is called an open mesh and closed meshes.

When a filet crochet pattern is designed, it is first started on grid charts. Some boxes in the grids are shaded to get a desired design or pattern.

Stitches used in Filet crochet

Filet crochet technique is one of the easiest of the crochet techniques out there. Essentially, it used only chain and double crochet stitches in the pattern.

In some cases, like the Summer Sampler throw, we may use tall stitches like treble crochet and extended double crochet stitches.

When you are comfortable with the basic filet crochet techniques, and feel fancy, you can explore advanced stitches like the filet crochet lacet stitch.

Getting started with the foundation chain

The number of chains you need to make to get started with your filet crochet project is calculated as follows:

No. of ch = no. of blocks in the row * 3 + 1 + turning ch (refer pic1)

The turning chain is the additional chain you need to bring the height of the working loop to the height of the stitches to be formed consecutively.

You can also consider making the turning chains to substitute your first double crochet stitch.
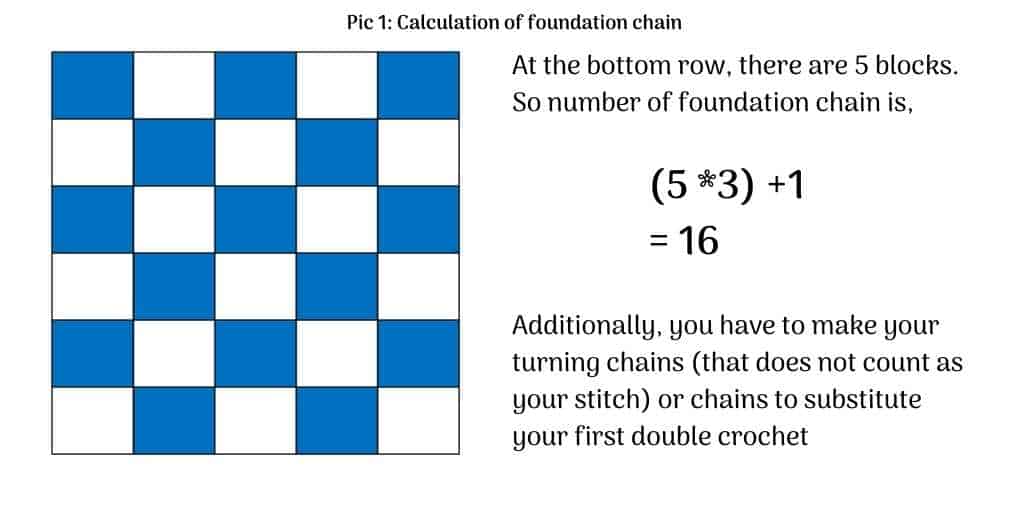
foundation chain for filet crochet: filet crochet how to

How to read the chart? Direction of work

Like your regular crochet chart, the filet crochet grid chart is also worked from bottom to top. The direction of work doesn’t usually matter until you are going back and forth from row to row.

But for the ease of keeping track of the rows, mimic the way you usually crochet. For right handers, the first row starts at right and for the lefties, the first row starts in the left-side.

In a nutshell, the grid chart is worked from right to left and then left to right, for right-handed crocheters and vice-versa for left-handed crocheters. Just make sure to switch the direction of working the chart for every row.

Chart to stitches

Traditionally, all filet crochet patters are depicted in the form of a grid chart. This design must be then translated into fabric with crochet stitches.

Let us see how a filet crochet chart is usually brought into fabric.

In every row of the grid chart, each vertical line is substituted by a double crochet stitch. (refer pic2)
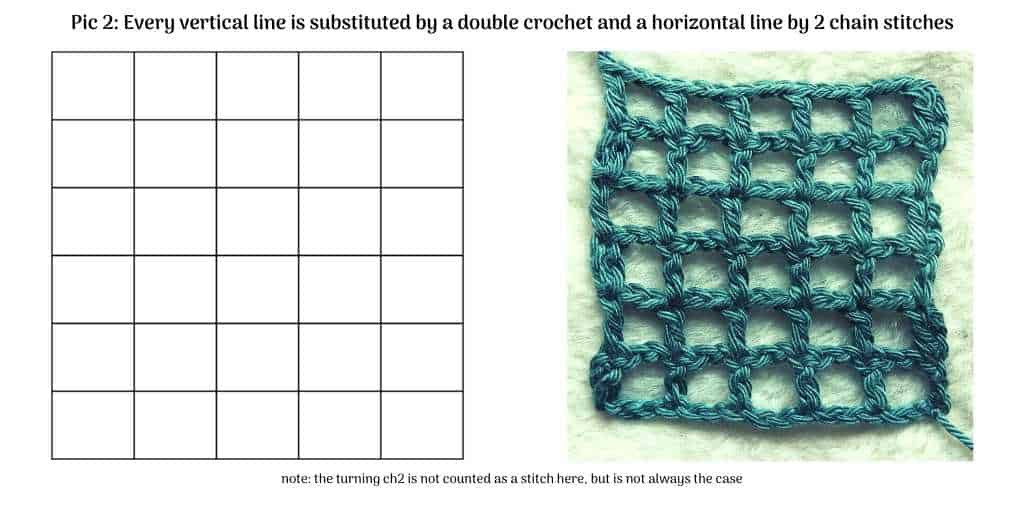
skeleton of filet crochet: filet crochet how to

In every row, each horizontal line is substituted with 2 chain stitches.

The double crochet for the vertical lines and the ch2 for the horizontal lines form the skeleton of the filet crochet.

When you see a solid block in the grid, you substitute the ch2 with dc2. (refer pic3)

This is overall how filet crochet is usually done. Now let us get into the nuances.
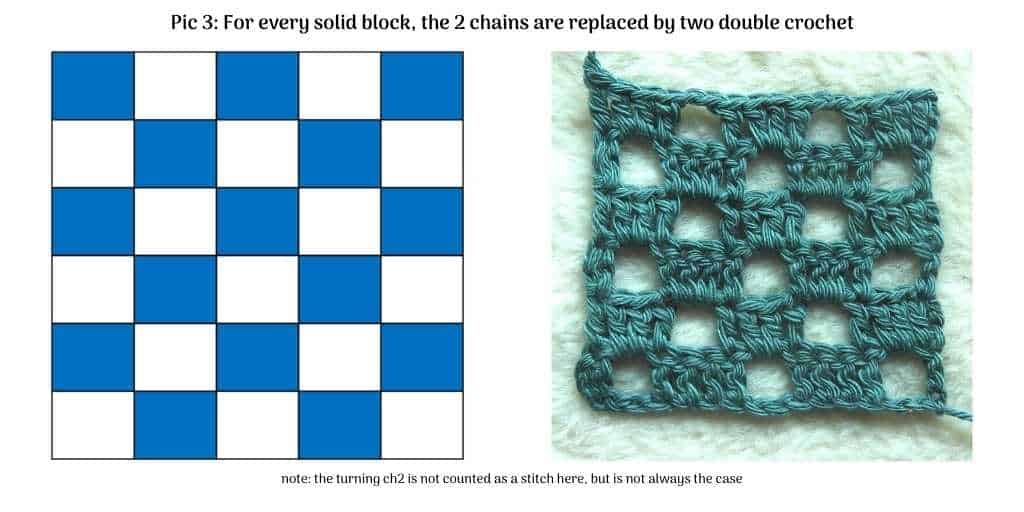
filling the solid blocks: filet crochet how to

Let’s talk yarn!

Filet crochet was originally used to make lace- fabrics and therefore only thin, lace weight yarns were used for filet crochet then. Particularly, 100% cotton lace weight yarns were used for filet crochet. In modern days, various yarn weights are used with the filet crochet technique. Ideally 100% cotton yarn, that is non-fuzzy preferably mercerized should be used for filet crochet projects. This is because,

Cotton holds shape and blocks nicely. This enables clear visualization on the designs and patters in the filet crocheted items.

Fuzz-free yarns also helps in clear visualization of the design incorporated in your filet crochet project.

Gauge: How important it is?

In filet crochet, gauge plays a central role. The first reason is obviously to get the intended size of the product. And secondly, to get the pattern/design in the pattern. For instance, if the gauge is too loose, the design in your crocheted item will not show as effectively as it should.

As much as the stitch gauge, the row gauge is also particularly important. With shrunken or elongated height, your image in the pattern will not be a nice one.

The stitch gauge can easily be obtained by changing your hook size.

The row gauge can be obtained by changing to a taller or shorter stitch like extended double crochet or half double crochet, than mentioned in the pattern. 

Other factors that improve your filet crochet work

  • Placing stitches over chains: When you must make a solid block (closed mesh) over an open mesh, place your two double crochet stitches below the two chain stitches and not into it. This gives a smooth finish in both above-mentioned blocks.
  • Blocking: Blocking your finished items is especially important to bring out the perfect shape of the design in the pattern as well as to get the desired size of the item.

This sums all the fundamentals you need in your arsenal to get you started with filet crochet.

To practice all this hands on, a new e-book with all its details and Filet crochet spring/summer sampler throw.

You can get the e-book from my Ravelry store HERE


filet crochet how to - summer sampler throw

Join my Facebook group Yarn ‘n Me makers for more fun content and interaction.

Visit My Ravelry Store to get the print-friendly versions of all my patterns

Dilly Diamond Placemats Set: The Textured Crochet Placemat And Coaster Pattern You Need

Dilly Diamond Placemats set: The textured crochet placemat and coaster pattern you need

Are you bored of your regular circular crochet placemats and coaster pattern?

Are you looking for some unique not-circular placemat set to crochet for your home space?

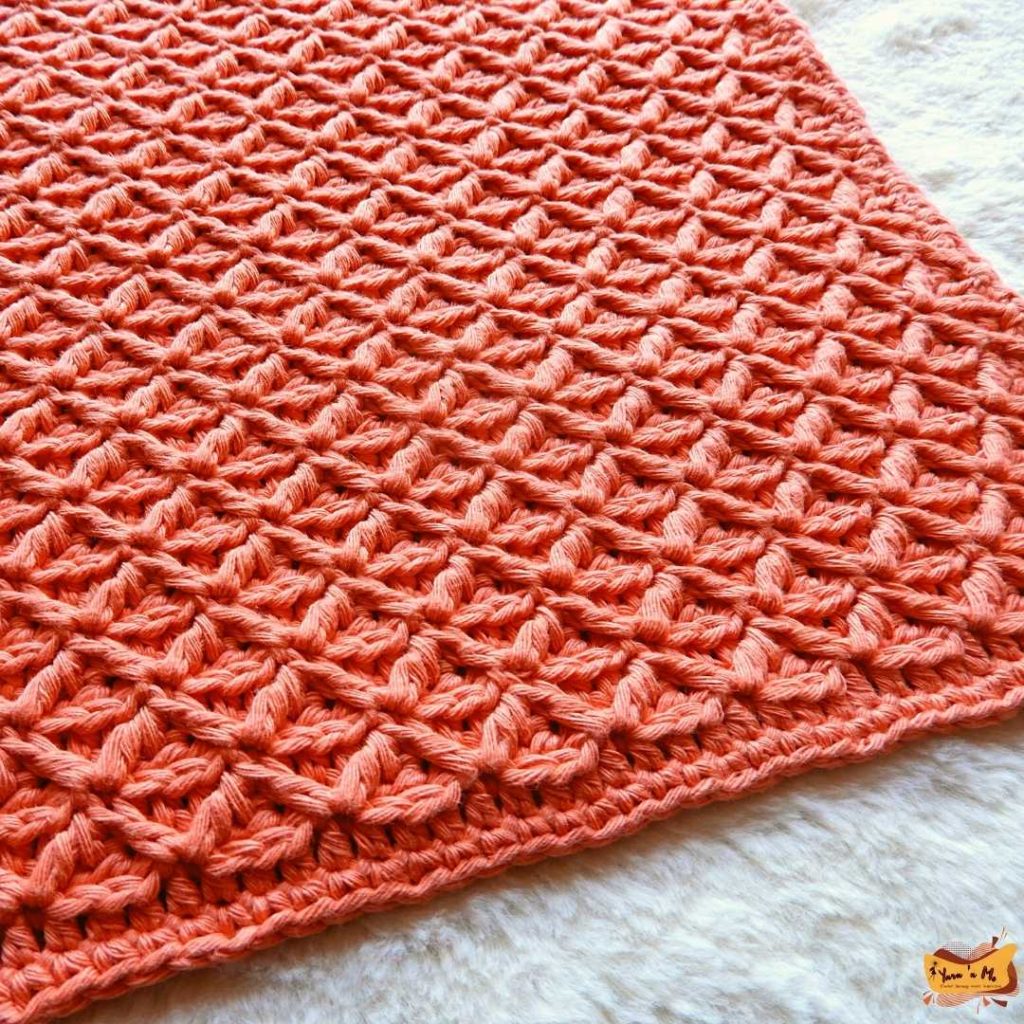
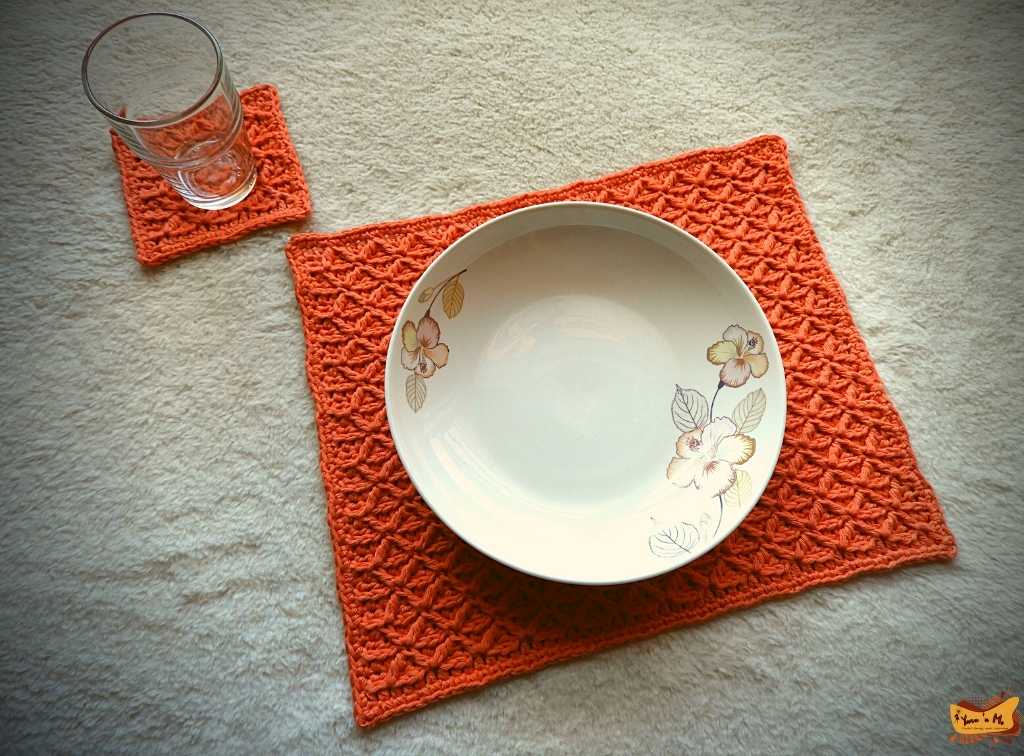
Dilly Diamond Placemats set is exactly what you need. The placemats and coasters are rectangle and square respectively, designed using textured stitches (but not using post stitches). And can instantly elevate the look of your dining space.

Get your copy of the Dilly Diamond crochet placemat and coaster pattern HERE

Design Inspiration

Rug coasters are quite trending as gifts from the maker community. They are quick to make, have a rustic look to them and if I might say, feels unique from those traditional round-shaped coasters. I always wanted to make a different kind of rug coaster, something textured yet practical. And ended up with the coaster design, which later I expanded to a placemat set

The Design

Dilly Diamond Placemat and coaster pattern are designed to be rectangle and square respectively of dimensions 12.6” by 10” and 4” by 4”.

The texture in this pattern is obtained by placing the stitches varyingly in three of the loops of half double crochet stitches. 

The diamond shape is obtained by making two stitches together by skipping stitches in between the legs of those two stitches. The pattern has picture tutorials as well, on how to make these stitches.

crochet placemat and coaster pattern

What you will need to make this crochet placemat and coaster pattern?

All you need to work this pattern up is a 4.5mm crochet hook and a 100% cotton worsted weight yarn. I used a little less than 2.5 skeins of Garnstudio Drops Paris for one set of coaster and placemat.

And of course, you will need a copy of the pattern, which you can get HERE.

Do you know? The pattern has written instructions, a stitch chart, and picture tutorials for the stitches

Yes, you have all you need to make the pattern. 

So, what are you waiting for? Grab the pattern HERE and start making your Dilly Diamond placemats set. Just make sure to tag me when you post your finished object!

crochet placemat and coaster pattern

Looking for circular placemats set? Check out my Cluster Around Placemats, a free crochet pattern

Visit My Ravelry Store to get the print-friendly versions of all my patterns

7 surprisingly simple ways to find time to crochet

Are you running short of time that you hardly get time for yourself, let alone a hobby?

Or are you one of those people that has a lot on their plate and wondering how to fit in more?

Being a crochet blogger myself, there has been days (and there will) when I have hardly 30 minutes to actually sit down to crochet. I kid you not, this is the reality.

There are so many out there that crochet/knit, has given up on their hobby for lack of time during their day. What if I tell you can very well pursue your favourite hobby amidst your busy schedules?

Here are my 7 tried and tested ways you can find time to crochet in your day.

1.Keep it simple.

The last thing you want to do when you are struggling to find time to crochet is picking up a project with intricate designs. Don’t get me wrong, I am not saying that you cannot take up such projects altogether.

Choose simpler projects with easy stitch and row repetitions to work on, until you get the rhythm going. By doing so, you can cut sown the time of looking into the pattern every now and then and get more time into crocheting.

Simple designs like Simple Summer shawl and Elegance in Elements cardigan need very less time to get the hang of the pattern and you can get more time to crochet.

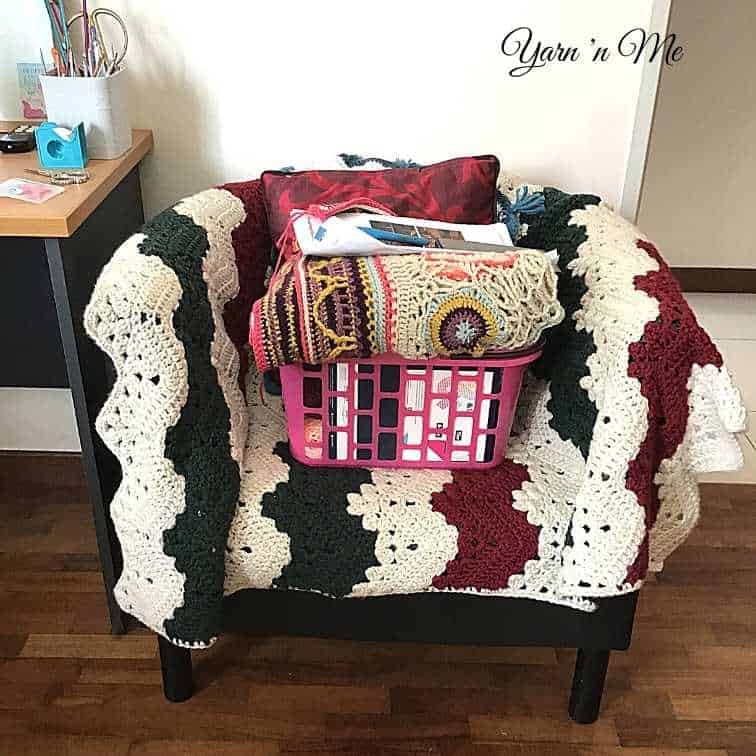
Cozy crochet corner. Have a designated place to crochet in the vicinity of the most accessed parts of your home

2. Set a cozy-crochet-corner.

A cozy-crochet-corner is any comfortable place in your house where you can sit and crochet. It can range anything from a dedicated room to a section of your kitchen counter.

Make sure it is in the vicinity of your most-accessed places of your house and keep all your crochet stuff for the project you are working on near the crochet corner. You can keep your stuff in a large basket.

Your cozy-crochet-corner should be instantly accessible so that you can get there to crochet even for a few minutes.

3. Crochet in-between tasks.

Having set your cozy-crochet-corner, you can now resort to your space as and when you get time. Crocheting in-between tasks in one way to squeeze in time.

I do this especially while cooking. I slither into my crochet corner while the cooking is under process, like the waiting time when something is boiling, and you have nothing else to do.

Even five minutes is precious when you are pressed for time. Therefore, crocheting in between tasks is the way to go for those are trying to find time to crochet. But make sure to keep your projects simple. You don’t want to be looking into the pattern in the short span of time.

4. Crochet on the go

This one is for those of you who get a lot of time sitting outside, for instance kids playing in the park, lunch breaks in office and travelling time.

All you have to do is, always have a project on hand, packed in a project bag or even a Ziplock bag and keep it in your bag or purse. Whenever you find yourself sitting simply, grab your project and start working on it.

Just be mindful of your project size and the amount of yarn you must carry. To crochet on the go, one skein projects like Wanderlust shawlette is the best as the space occupied by yarn is very minimal.

Multitasking is the way to go if you have got a lot on your plate

5. Multitasking

Are you someone like me who likes to indulge in a lot of activities? I love to read, watch videos on YouTube and love listening to songs and podcast at times. If you are any or many of these, I’ve got you covered.

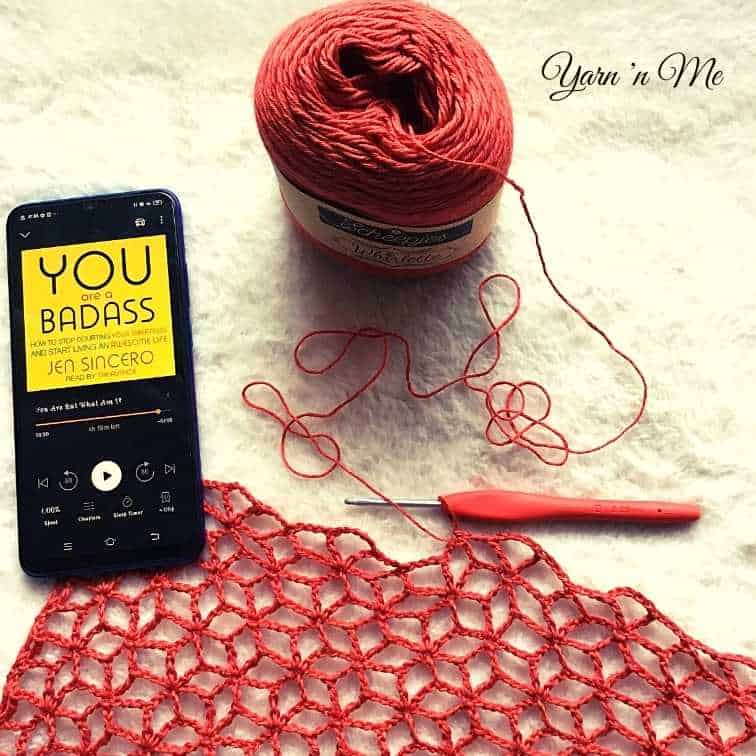
You can very well pick up your crochet project while doing any of these activities. My favourite is listening audiobooks and crocheting. I can do this all day every day, and I can never have enough.

Are you looking to take this up? Read my post on Multitasking while crocheting and I’m sure you will start doing it immediately.

6. Schedule your crochet time

Your craft is your self-care too. It’s the time you get to spend with you. So, why not have an allocated time for it?

Well, I know it is easier said than done. But in this busy world and especially at this time where some of us had to send most of the time indoors, it is particularly important to take time for ourselves to refresh and replenish.

When finding time to crochet is difficult, we ought to schedule time either before dawn or dusk, at least to keep our sanity in check.

For me, I like to start me day before sunrise with a large hot cup of cumin water and crochet project with a mild music in the background. I do this most days and those days have been the wonderful.

So, schedule at least 30 minutes in your day to crochet and see what difference it brings to your life. If you would like to know the positive impacts of crocheting, read this post HERE.

7. Find a crochet buddy.

Befriend someone you vibe with and plan projects together. Be accountable to each other and plan to complete sections of the project together. You can also form an accountability group and meet (online or in-person) once a while to check-in.

Having a friend like this breaks the monotony of having to do stuff alone and brings in motivation to pursue your craft. If you are looking for an accountability crochet group, come join Yarn ‘n Me Makers. You will definitely have fun in there with a lot of crochet stuff going on.

Takeaway

Now that you know how to find time to crochet, its time to grab your yarn and hook and start wiping up some stitches. But always remember to,

  • Set realistic goals.
  • Plan your projects ahead.
  • Give yourself grace.

After all, we don’t not want crocheting to be another item on our to-do list but a means to soothe and relax ourselves. So incorporate and implements at least two of these tips and experience the fun and therapy of crocheting.

So, which of these tips are you going to implement in your daily life?

Join my Facebook group Yarn ‘n Me makers for more fun content and interaction.

Visit My Ravelry Store to get the print-friendly versions of all my patterns
My Huldra Sweater using Scheepjes whirl: What you should know

Huldra sweater is a crochet pattern designed by Tatsiana Kupryianchyk at Lilla Bjorn Crochet World. It is originally a pull-sleeves sweater that is suitable for colder months. But the designer herself has made a sample using Scheepjes whirl ombre and a contrasting whirlette. This post details my take on the Huldra sweater crochet pattern and my thoughts on the same.

About the Huldra Sweater crochet pattern

The Huldra sweater is a top-down seamlessly made crochet sweater pattern. This pattern was originally designed as a full sleeved sweater using Scheepjes Our Tribe yarn in three colours. Check out more details about the pattern here.

The pattern is available to be made in eight sizes and is designed as an oversized sweater with a positive ease of 4-8”. There is also an option to adjust the length of the garment and leave out the sleeves as well. For people like me, who has always lived in tropical countries, the designer has also made a sample using the popular Scheepjes whirl and contrasting Whirlette combo. 

Check out the versatility of Scheepjes whirl here

Yarn selection for the pattern

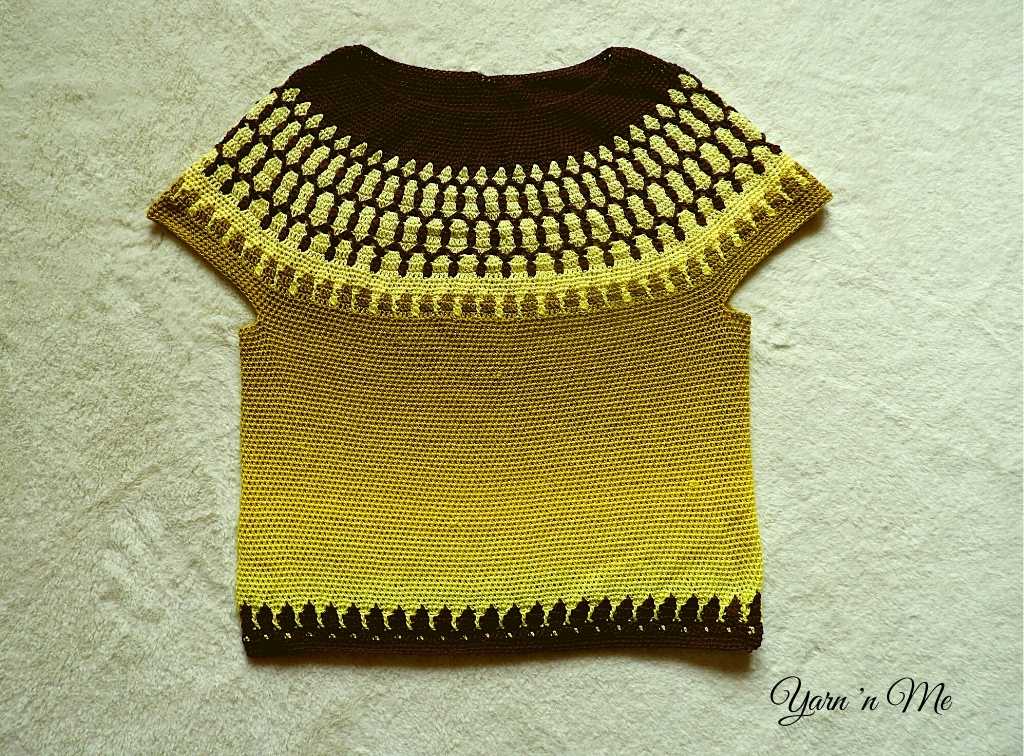
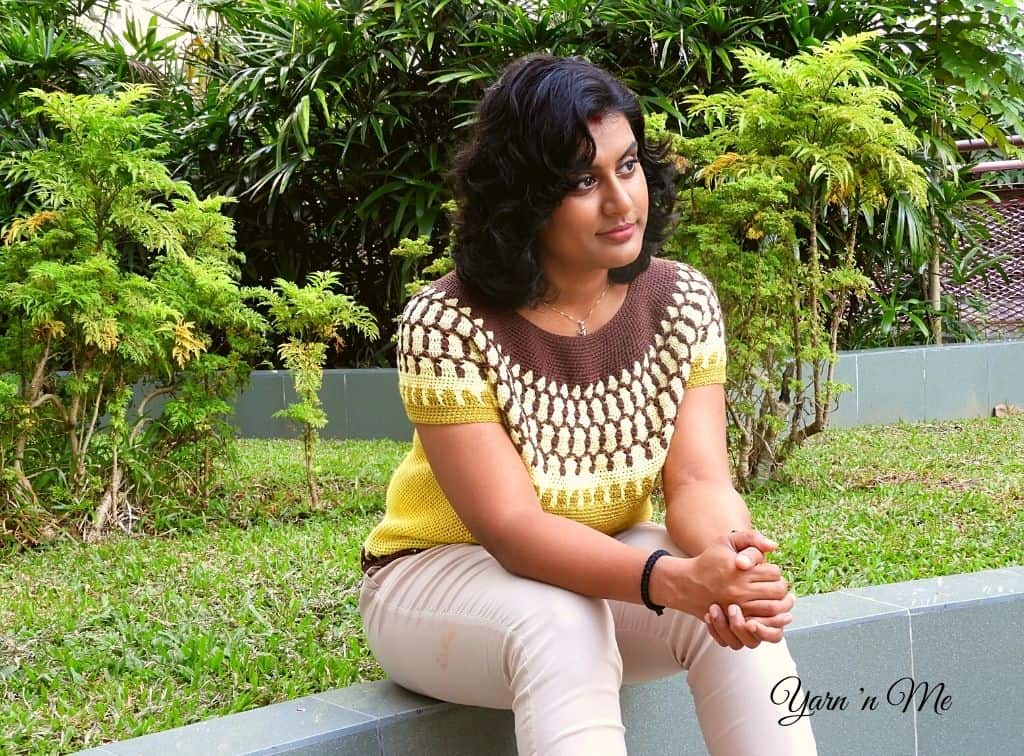
As obvious as it is, I attempted my Huldra sweater using Scheepjes whirl and whirlette. I used 551 Daffodil Dolally from the Ombré Collection and a contrasting whirlette 863 Chocolate. The sweater comes out at its best only when you use an ombre whirl and a totally contrasting whirlette. 

I got the gauge using 3.25mm hook as supposed to a 3mm crochet hook, which is quite alright. Also, I decided to do the size small and get a fitted garment as opposed to the original notion of the pattern as an oversized sweater. Therefore I only needed one whirl and one whirlette.

What I like about this pattern- the positives

Tatsiana Kupryianchyk at Lilla Bjorn Crochet World, has done a fantastic job in designing the Huldra sweater crochet pattern. It is of course, an easy pattern to work one. But not too easy as well. It has the perfect proportion of simple and easy repeats that allows for a mindless repetitive crocheting and an intermediate/advance level of techniques involved.

The centre of attraction is the yoke. The yoke has a beautiful colour work that is done using alternating the scheepjes whirl and whirlette every row. There is a little bit of back and forth crocheting involved in the yoke for neck shaping and other that those few rows, the entire sweater is crocheted in rounds.

As the row had alternating working yarns, I did struggle a bit initially to get hang on which row to crochet in. But the designer has got us covered with detailed photo-tutorials. Almost the entire yoke has colour-work involved (except a last few rounds to get the desired measurement). Once the yoke is divided and sleeves are obtained, the body is worked in rounds in spiral (with joining to end every round).

And did I mention that a different placing of half double crochet stitches is used in this pattern?

Huldra sweater crochet

What could have been better?

The design is fantastic and no comments on that. But I felt that the pattern writing could have been inclusive for people using Scheepjes whirl-whirlette combo as well. 

We know that the Huldra sweater crochet pattern was originally designed using Scheepjes tribe yarn in three colours, say A, B, C. While using whirl and whirlette, apparently scheepjes whirl takes the places of  two of the yarn colours, say B and C (different ends of the yarn), and the whirlette is colour A. A some point of time the roles of these yarns get exchanges say the whirlette (yarn A) had to take up the role of yarn B.

While working through the pattern I had to refer the picture of the designer’s sample back and forth to see what has has been used. There were no instructions mentioned in the original pattern on which yarn to be used for Scheepjes whirlette. 

My final thoughts on the Huldra sweater crochet pattern

Huldra sweater crochet pattern is a fantastic design. I happened to make it when I was taking a break from designing myself. It was a perfect fuel to rejuvenate my creative brain. And I totally love the final produce. It is so light in weight and is perfect and comfortable to wear in my hot place. If you are looking to make in larger sizes you will need more that one Scheepjes whirl and whirlette.

Huldra sweater crochet pattern

Join my Facebook group Yarn ‘n Me makers for more fun content and interaction.

Visit My Ravelry Store to get the print-friendly versions of all my patterns
6 fun and easy garments you can make using Scheepjes whirl (free Scheepjes whirl patterns)

Scheepjes whirl, is by far, the most versatile yarn I have come across at least for the summers. It is light in weight, yet gives a sumptuous  amount of yardage per 100g. It is the perfect blend of cotton and acrylic and the maintenance you need for the fabric thus obtained is bare minimum. There are a ton of patterns designed using Scheepjes whirl and this post lists 5 free and easy crochet garments patterns using Scheepjes whirl.

Meanwhile, if you are pretty new to crocheting with Scheepjes whirl, you might want to read this post about SCHEEPJES WHIRL before proceeding with this post. Now, let’s get into our listing.

Scheepjes whirl garments free pattern

1. Whirl Mandala Cardigan

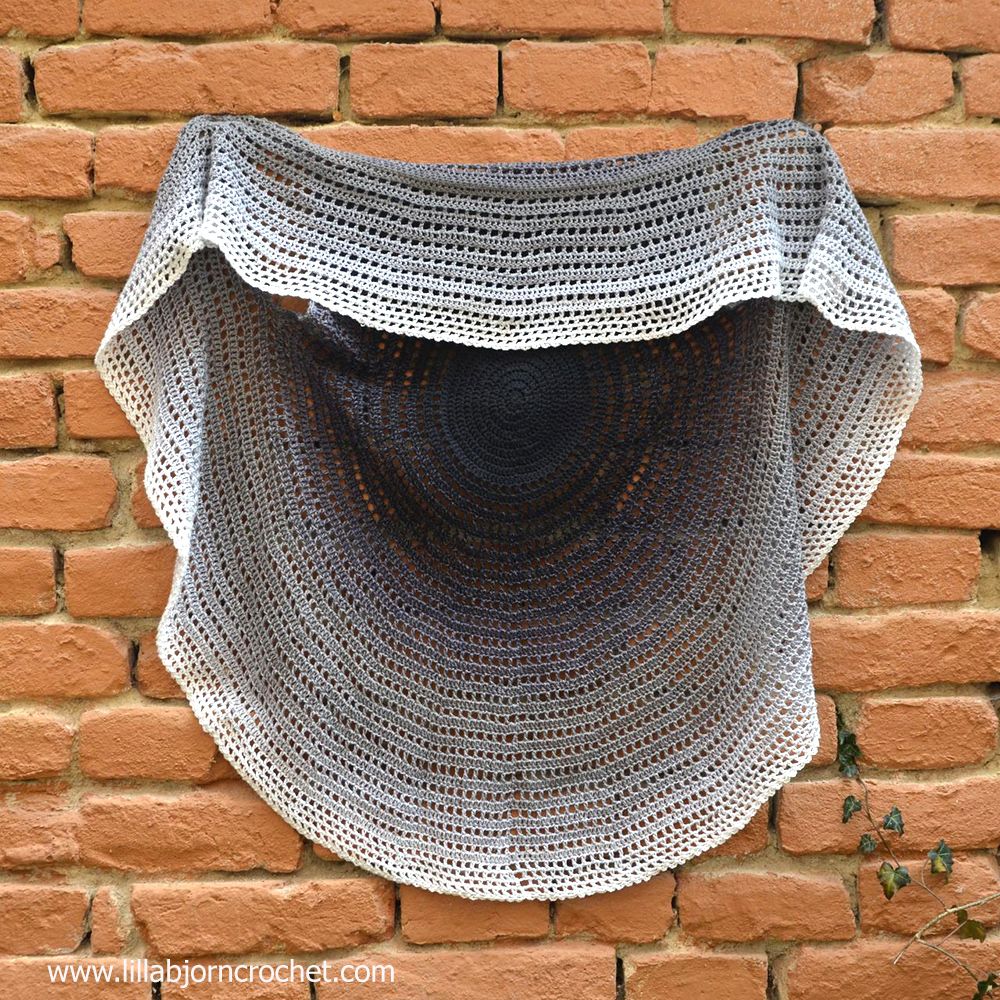
Whirl Mandala Cardigan is a beginner-friendly free crochet pattern using Scheepjes whirl by Tatsiana at Lilla Björn crochet. It is a one size pattern to fit sizes S to L. You can access the free pattern of this cardigan from her website here

Whirl Mandala Cardigan free pattern

2. Spotting Clouds top

Spotting clouds top is a beautiful top designed by Christina at A Spoonful of Yarn. This top take inspiration from clouds by sky-gazing. This pattern is available for free on her website and you can get the printable version for a small fee. Access free pattern HERE

Scheepjes whirl garments free pattern

3. In a Whirl top

One whirl top is designed by Tamara Seasholtz is available as free downloadable crochet pattern from here Ravelry Store. It is a kind of flutter-sleeve top with beautiful bells on the sleeve-trim. There is also an option available to extend this top to a tipper dress, like a swim suit cover. You can get the free PDF of this pattern down here.

In a Whirl top free crochet pattern

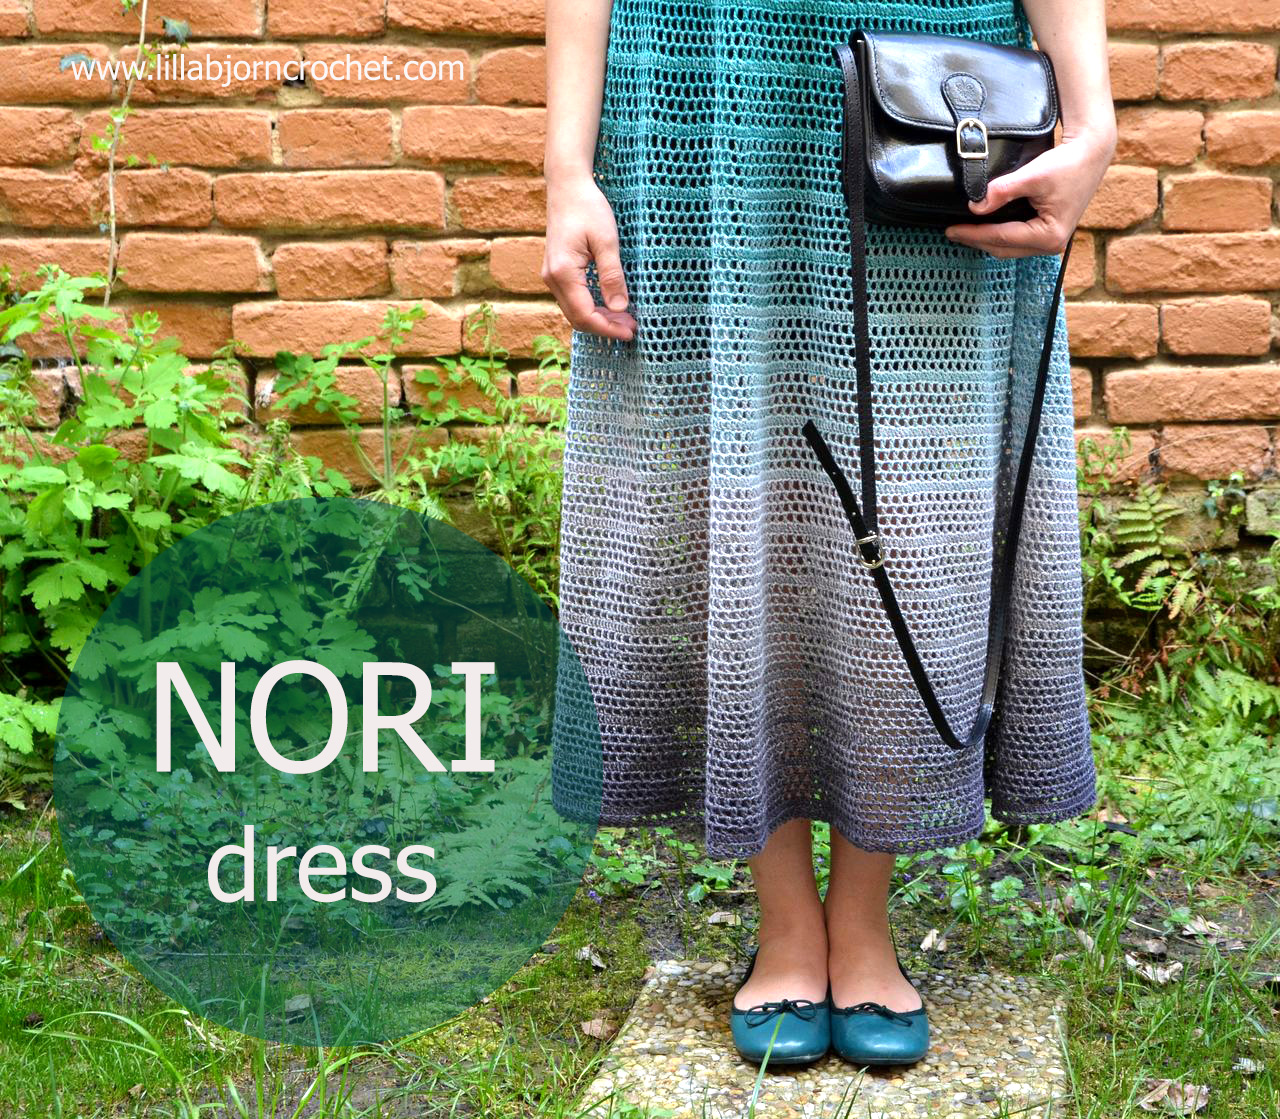
4. Nori Dress

 Nori dress is a free crochet dress pattern uses two Scheepjes whirls. It is a beginner-friendly pattern designed by Tatsiana at Lilla Björn crochet. It is a loose fitted dress and you can access the free pattern from her website

Nori Dress free pattern

Scheepjes whirl garments free pattern

5. Basic T-shirt in crochet

This crochet pattern using Scheepjes whirl uses less than a whirl to complete the entire pattern. This is a top-down t-shirt designed by Catalina at Katerina.com. This crochet garment is for anyone who wants to take their first attempt in a top-down technique of crocheting a top. You can access the free pattern from her website here

Basic T-shirt in crochet free pattern

6.Elegance in Elements Cardigan

This simple cocoon cardigan is designed by, yours truly. It is a simple rectangle folded to form a cocoon cardigan. This pattern is for anyone and everyone who wants to make their very first crochet cardigan. The best thing about this cardigan is, you can make it to any size to fit your needs, although it was designed as a fitted cardigan. You also get a stitch diagram to support the design. Read more on the pattern and access the free crochet pattern HERE

Scheepjes whirl garments free pattern

Well, that is the list of the 6 free crochet garment patterns you can make using Scheepjes whirl. Check out the posts below if you would like to see the lists of triangle shawls and rectangle scarfs using Scheepjes whirl. 

Do you have anymore patterns to add to the list? Let me know in the comments below.

Join my Facebook group Yarn ‘n Me makers for more fun content and interaction.

Visit My Ravelry Store to get the print-friendly versions of all my patterns
6 stunning free scarf patterns using Scheepjes whirl

Scheepjes whirl is a versatile yarn and there is almost nothing you cannot crochet with it. It is by far my most favourite yarn out there and I always tend to reach our to Scheepjes whirl for my projects.

Read this post HERE where I express my love for Scheepjes whirl.

There are several free crochet patterns out there that you can make with one Scheepjes whirl. In this post, you get a list of some fabulous free crochet scarf patterns that you can make with a whirl.

scheepjes whirl crochet pattern free

1. In a whirl Scarf

In a whirl scarf brings out the beauty of Scheepjes whirl in its entirety. Designed by Jane Hunter, this is free crochet scarf pattern and is available as free Ravelry download. The pattern has simple repetitive stitches that lets the colour gradient do its job. In a whirl scarf is written in UK terms.

Access the free pattern HERE


2. Wrapped in diamonds Shawl

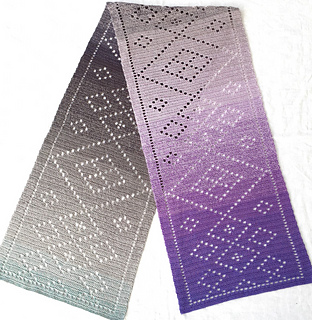
Designed by Torun Johansson using fillet crochet technique this is  pretty solid scarf with beautiful geometrical shapes on them.  It is available on Ravelry as free download. The only downside is (not really a downside though) that, the pattern does not carry neither written instructions nor crochet chart. It only contains fillet crochet chart. But the scarf is so beautiful that you cannot consider that a ‘downside’.

Find the pattern HERE

scheepjes whirl crochet scarf patterns free
Scheepjes whirl rectangle scarf free pattern

3. Serina Scarf

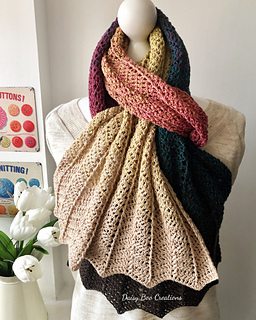
Serina scarf is a chevron stitch scarf with subtle texture. The texture here is obtained by the post stitches. The crochet scarf pattern is designed by Suzanne Reed @Daisy Boo creationsThis free crochet scarf pattern is available for purchase for free from the designer’s website.

Get access to the free crochet scarf pattern HERE


4. Rough Diamonds

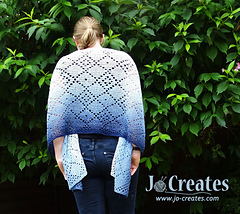
Rough Diamonds is a fairly large crochet product to call it a scarf. It is large enough to use it as a wrap. Rough Diamonds Shawl is designed using fillet crochet technique by Jo creates and is available as free Ravelry download.

Get the free pattern HERE


crochet scarf pattern free using scheepjes whirl
Scheepjes whirl crochet free patterns

5. Diamante Scarf

It is a simple scarf that uses filet crochet technique and is designed by Jellina Verhoeff @Jellina creations. This pattern has a supporting stitch diagram for the pattern. The free pattern of Diamante scarf is available on the blog and it also has a paid version for a small fee

Access the free pattern HERE


6. Portobello Scarf

Designed by Titti Stenki @Diwybytitti, this is the most famous of the rectangle scarf patterns free using Scheepjes whirl. This is of course a simple shawl, but also has several elements to keep the maker engaged and excited. The pattern downloadable from website.

Get the free crochet scarf pattern HERE


Scheepjes whirl rectangle scarf free pattern

This is the list of all the six free crochet scarf patterns using Scheepjes whirl. I would like to add one more to this list as an honorable mention- The Erigeneia in a Rectangle scarf. It is a free crochet scarf pattern but was not originally designed using Scheepjes whirl. It works up so beautifully using whirl. Check out my Take on Erigeneia in a Rectangle to get to know more. 

Are you looking to make triangle shawls with your whirl? I got you! Check out the list of triangle shawls using Scheepjes whirl HERE 

Let me know in the comments which one of these free crochet patterns you will be making with your Scheepjes whirl? Have you come across any other free scarf patterns? Let me know as well, so that we can add to this collection.


Join my Facebook group Yarn ‘n Me makers for more fun content and interaction.

Visit My Ravelry Store to get the print-friendly versions of all my patterns