Crocheting an impressive and handy everyday bag can be quite challenging because of two reasons – getting a good base from crocheting and finding the right stitch for your crochet bag. With is step-by-step instructions from this post on crochet bag with leather base, I would say more than 50% of your bag is tackled with just your bag base. Be it any shape and size of the ready-to-use bag base you can lay your hands on, I have got you covered.
Why crochet on a leather/faux leather bag base?
Of course you can make your bag by crocheting it from the base. But hear me out why you need a ready-to-use bag base for your crochet everyday bag
1. It it going to cut down on the yarn requirement
Obviously, when you crochet your bag right from the base, you are going to need more yarn. Especially for the base, the yarn requirement is going to be higher since the stitches have to be made so tight closely together.
By using a base like this, your finished product is going to be lighter still retaining the handmade elegance.
2. Your bag will have a sturdy base and a beautiful structure
The leather/faux-leather base is going to give you a sturdy and string base which is a little challenging to get from a crocheted bag base with minimal yarn usage. Therefore bag base is the way to go.
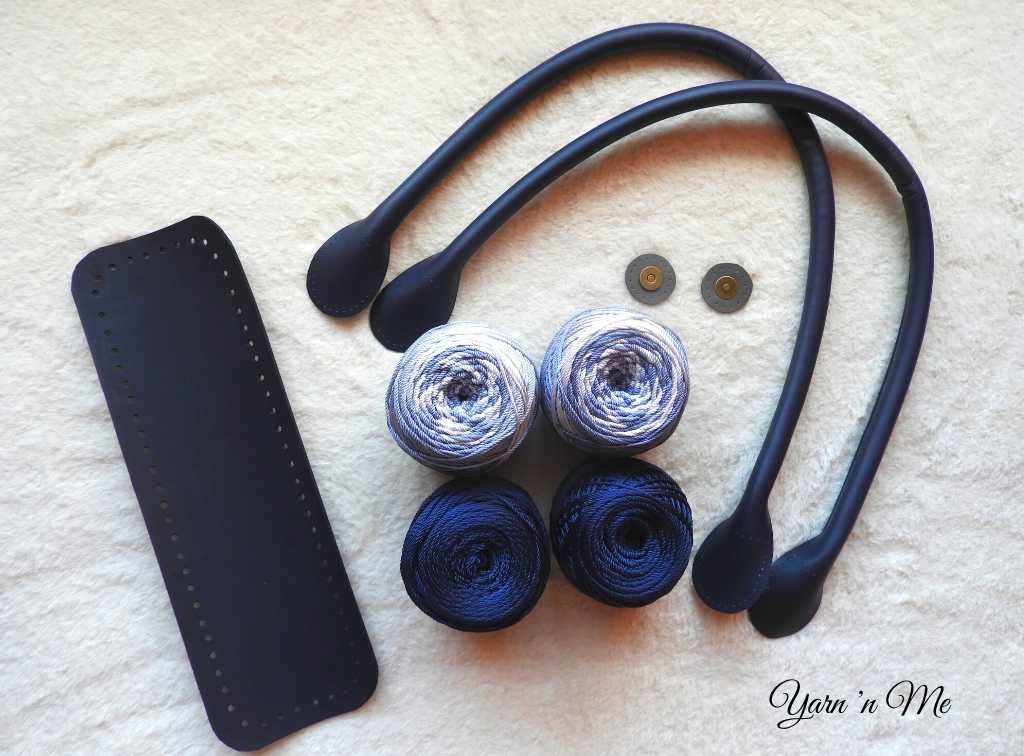
In this tutorial, I am using a faux- leather soft rectangle bag base of the dimension 30cm by 10cm that I purchased from Yarnholic, an online-based yarn shop available here in Singapore. This method works for all varieties and shapes of base.
Choosing the right hook
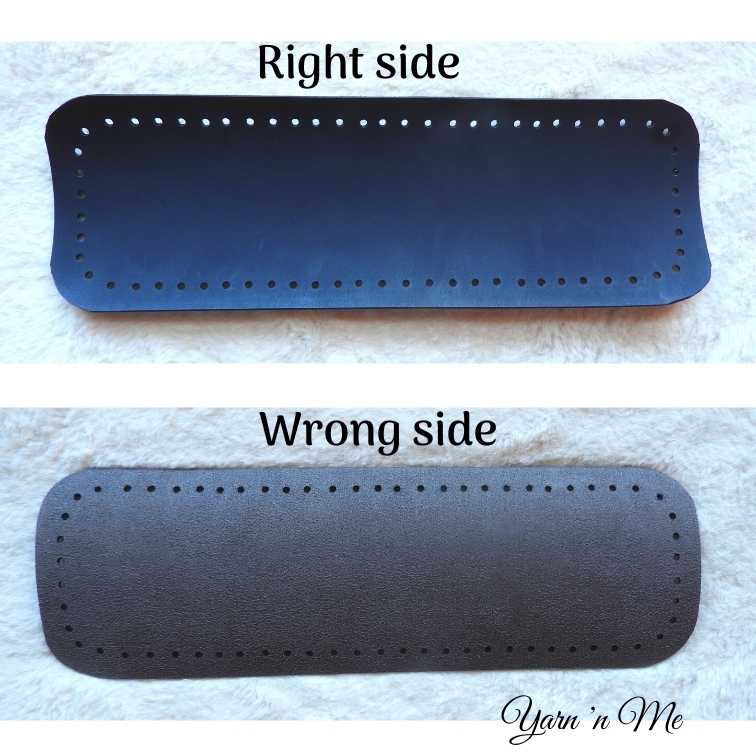
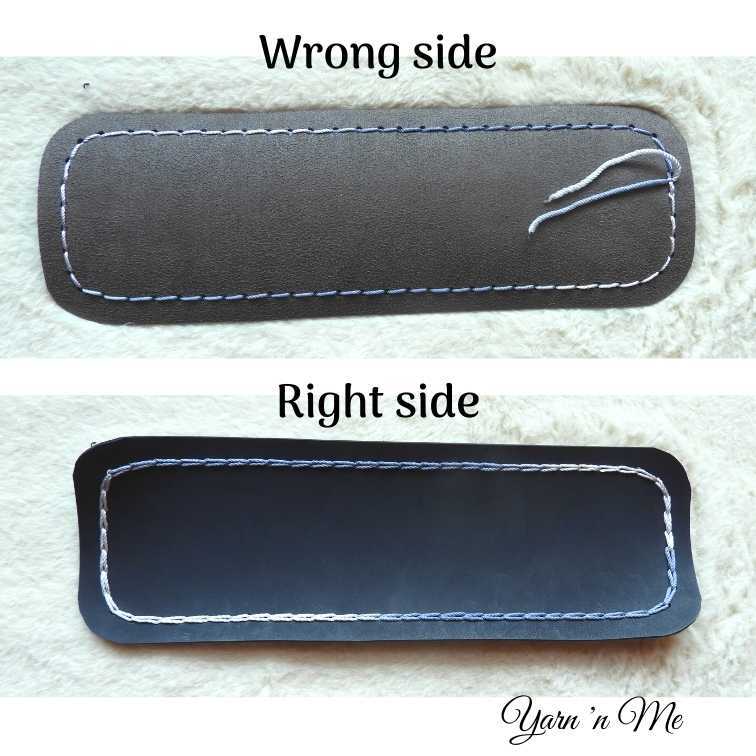
The good/right side of the base looks polished and have the colour of the case (in some models even the wrong side has the colour).
Which choosing the hook to crochet for the base, choose the hook size that fits in the holes in the base.
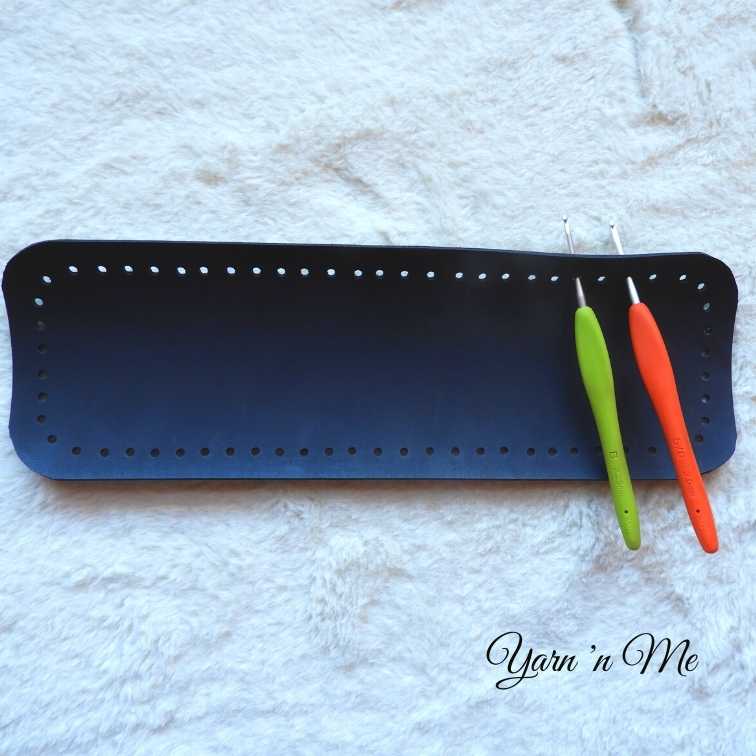
In my case, I am using a sport weight yarn that will give a tight and defined stitch with 3mm crochet hook. Besides, a 3mm crochet hook moves freely in and our of the bag base I use.
In most bases the holes are bigger and in few types the holes are much smaller. In case a smaller holes, use a hook that fits and moves in and out of the base, and need not struggle trying with a bigger hook to correspond the yarn you are using.
How to start crocheting over the leather bag base
Step 1
Make a slip knot. The knot should be approximately the length between two adjacent holes in the base.
Step 2
With the right side of the base facing you, pull your slipstitch through the middle hole (approximately) on the short side of the rectangle base
Note: If you are using a square base or a round base, the place of the hole you start does not matter.
Step 3
Insert the hook into your next adjacent hole, careful not to bring your knot to the right side.
Note: for right handed crocheters, the adjacent loop will be on the left side and left handed crocheters on the right.
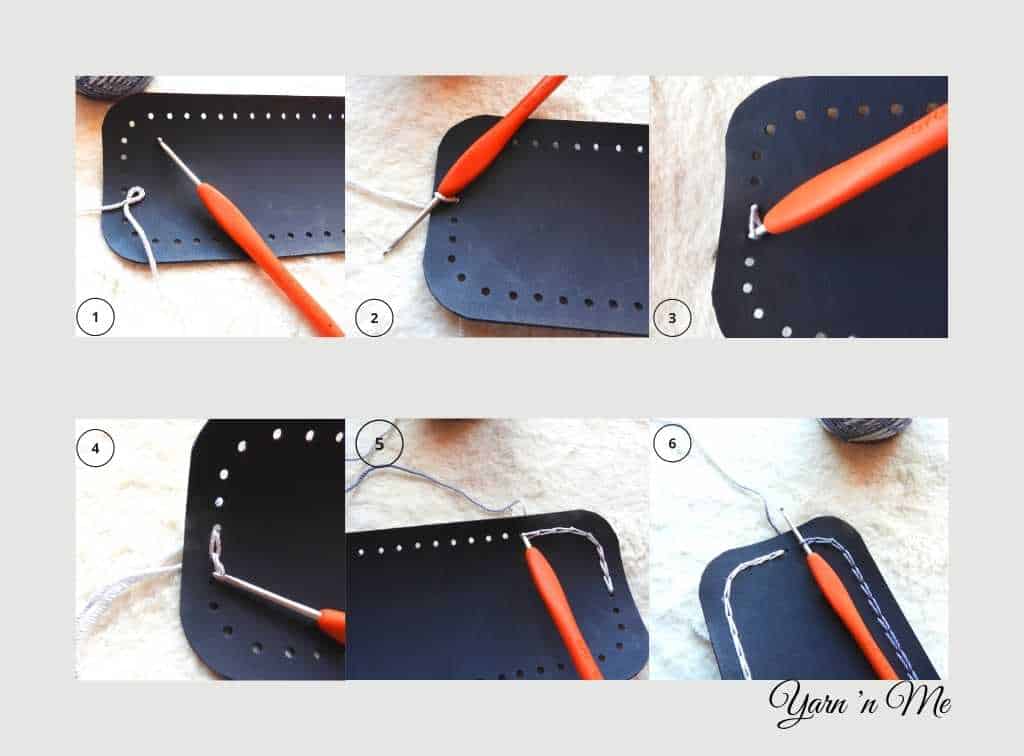
Step 4
Yarn over and pull up a loop approximately the length between two adjacent holes.
Step 5 & 6
Continue step 3 and 4 until the last hole.
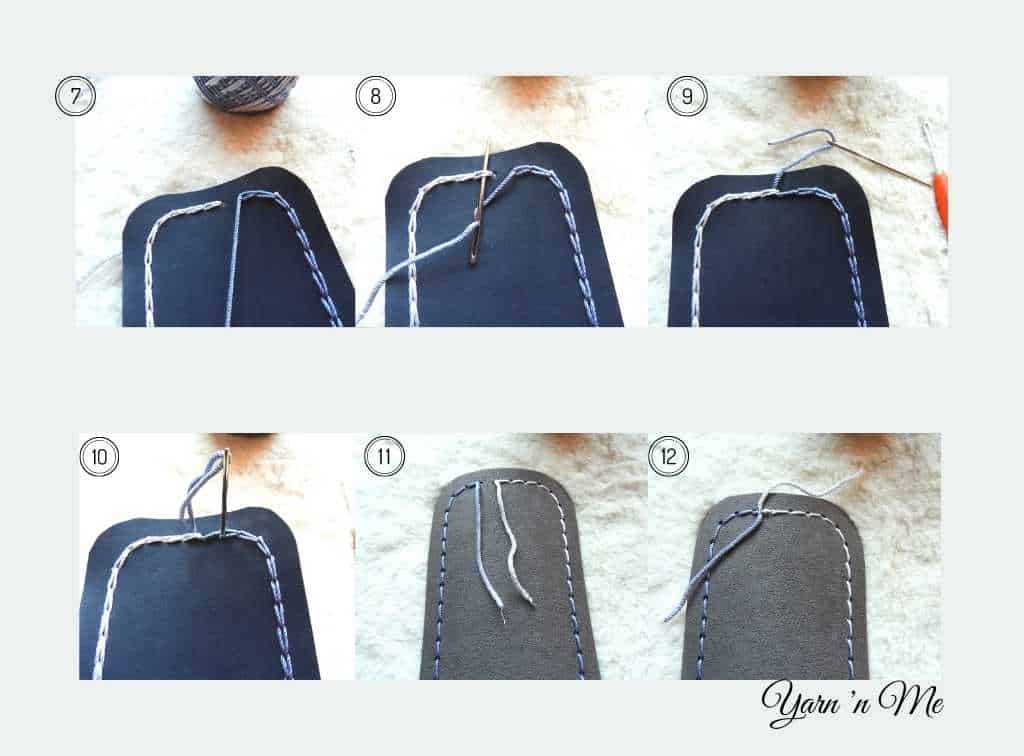
Finishing off the bag base
Now that you have made the foundation, let us complete the space between the first and last worked holes of the bag base, fasten off and finish.
Step 7
Snip the yarn leaving a tail of about 5” and pull through the last worked hole
Step 8
Thread the end on a yarn needle and insert the needle into the first formed chain. (refer picture below)
Step 9 & 10
Pull the needle through the first chain and insert into the last worked hole in the chain
Step 11 & 12
Turn to your wrong side and secure both the yarns tails by knotting them together.
While making the base chain do take care not to make these stitches,
- too tight that you cannot make stitches in them or
- too loose that the are in the condition of coming apart from the base
Now that we have completed the foundation chain over the bad base, we have continue making the set-up row before we actually go on crocheting our body of the bag. Because each of the chains can hold about two to four stitches.
The number of stitches in each of these chains depends on, the distance between two adjacent holes and, the size and weight of hook and yarn respectively.
The foundation row of the crochet bag with leather base
1. Switch to the crochet hook (that suits your yarn weight) you want to make your bag
2. Join yarn to the top loop of the middle chain in any of the shorter sides. This ensures that your join is not visible when you actually wear your bag.
3. Chain 2 and make three double crochet in the same chain, only in the top lool.
4. Make 3 double crochet in each of the chains, only in the top loop.
Note: This number may vary for you. Just make sure that the number of stitches in each chain is just nice to fill the entire chain. Too many stitches may make the body of the bag wobbly and too less chain may shrink the base and body of the bag.
5. In the chains present in four corners, place four double crochets each. 9refer image below)
Note: This is not applicable for a round bag base.
The principle here is to make more stitches at the corner to accommodate the curve in the sides.
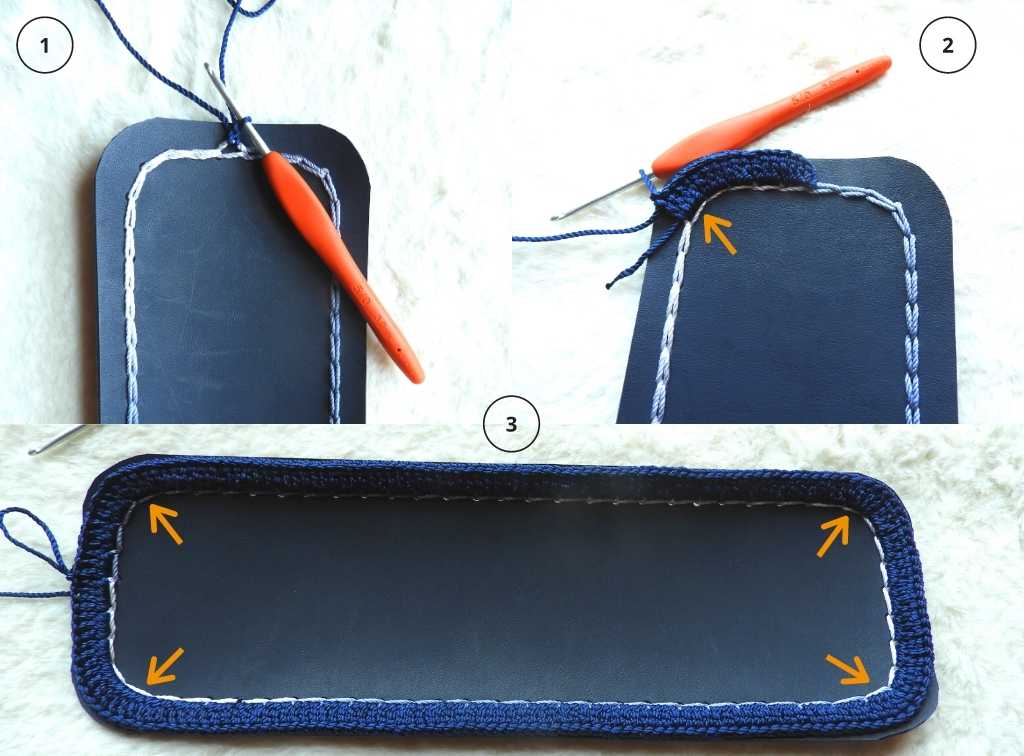
While deciding on the number of stitches to place in each chain, make sure the total number of stitches is equivalent to the stitch multiples of the stitch pattern you are intending to use for the body of the bag. The calculation has to be done prior to making the stitches.
This is how you make the base of the crochet bag with leather base.
For more bag and tote patterns check out the Pivoting Peaks tote and the Granny Square base tote bags
Join my Facebook group Yarn ‘n Me makers for more fun content and interaction.
Visit My Ravelry Store to get the print-friendly versions of all my patterns


0 Comments